Suz’ Jewelery


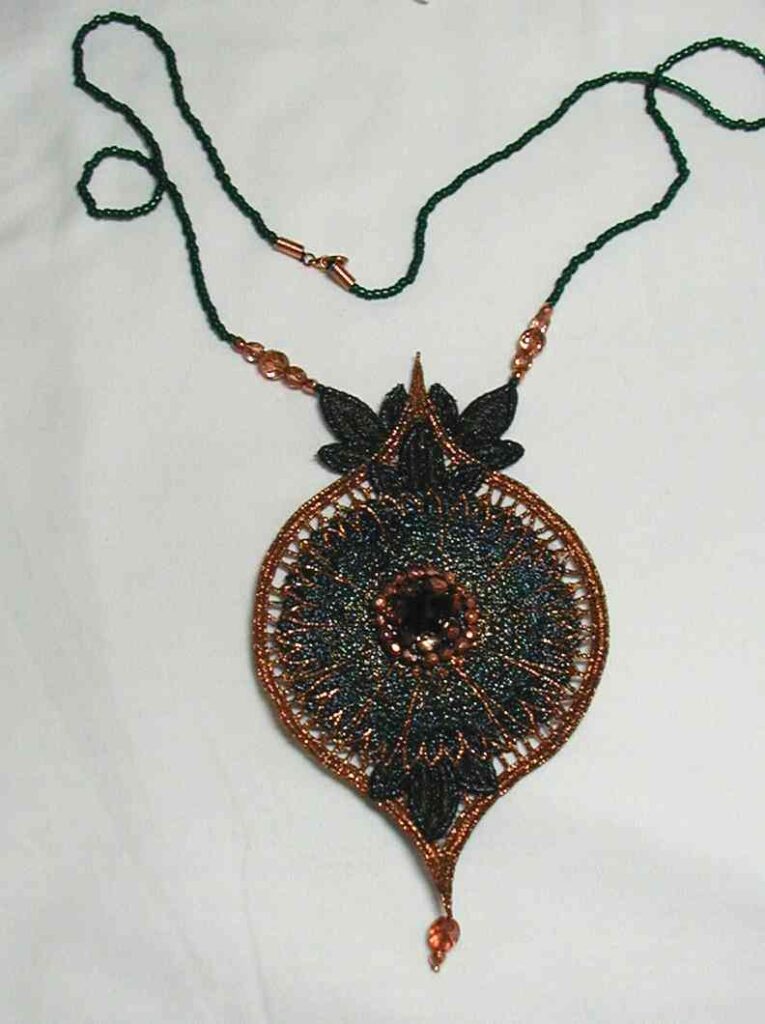
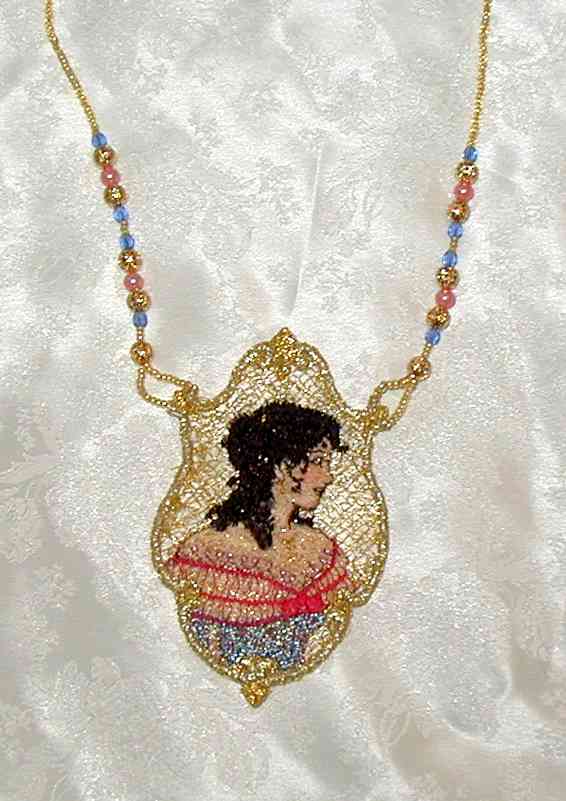
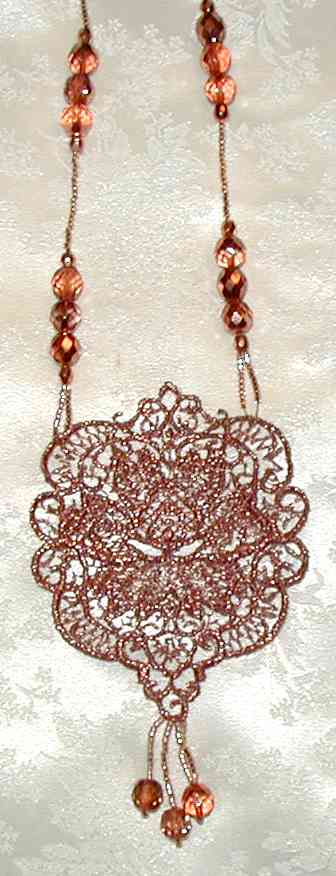
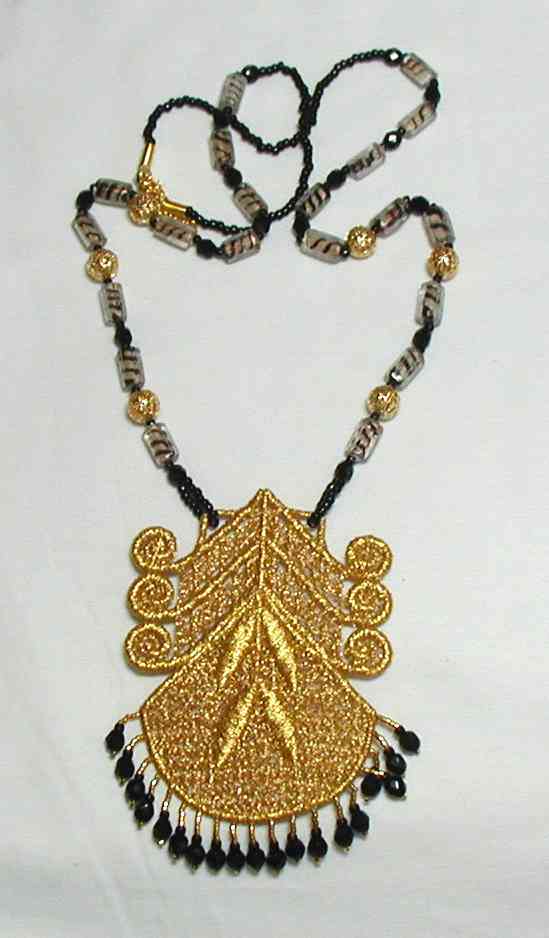
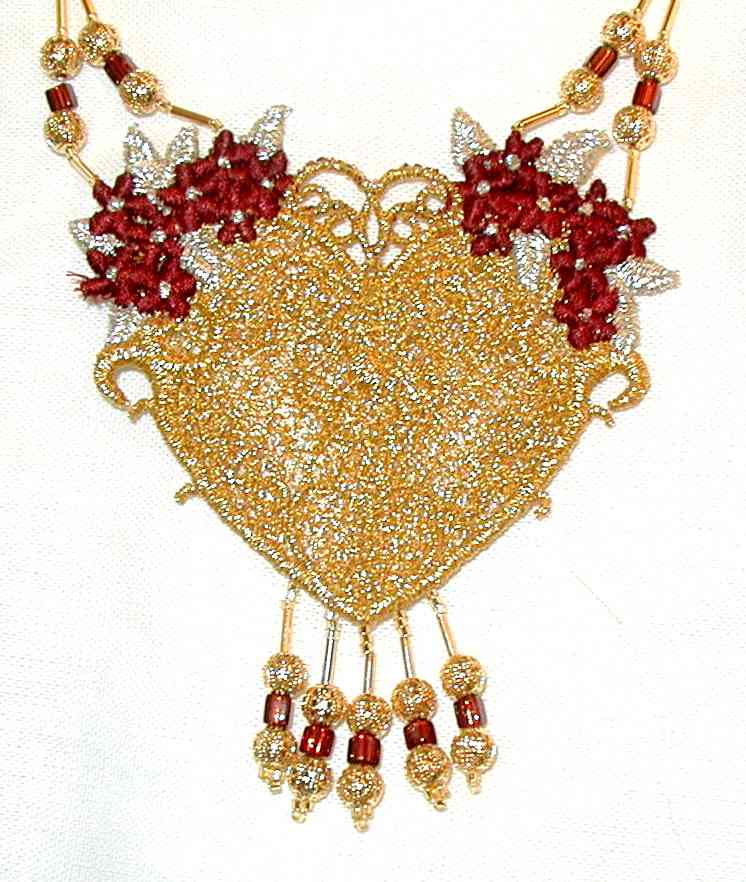
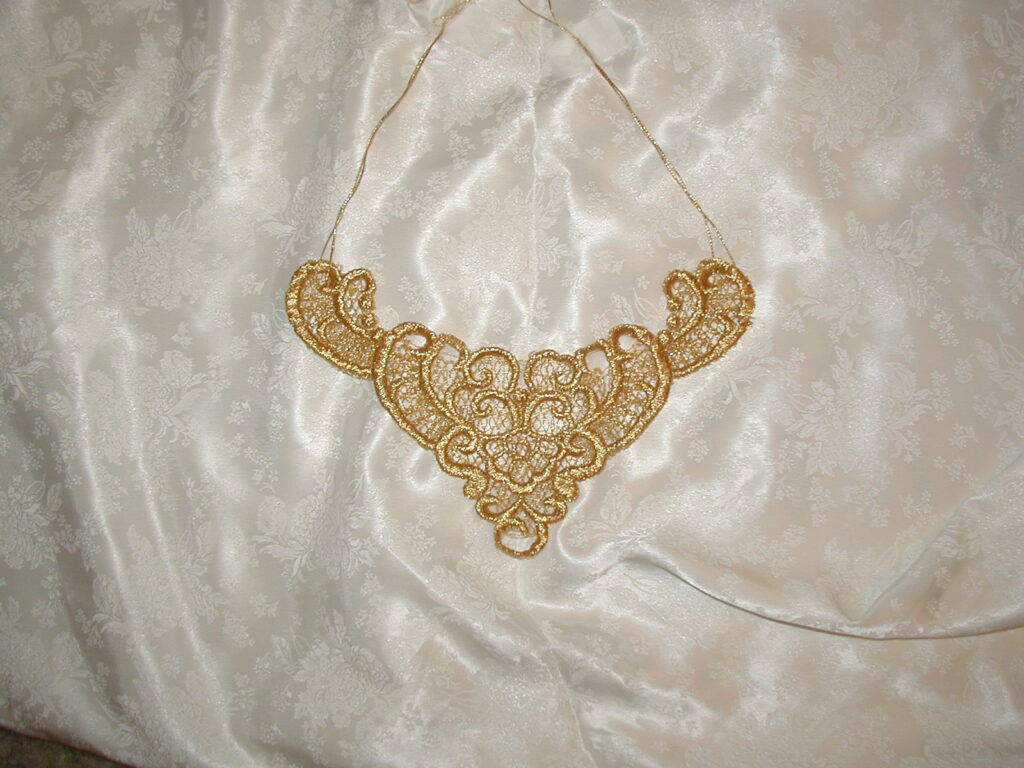
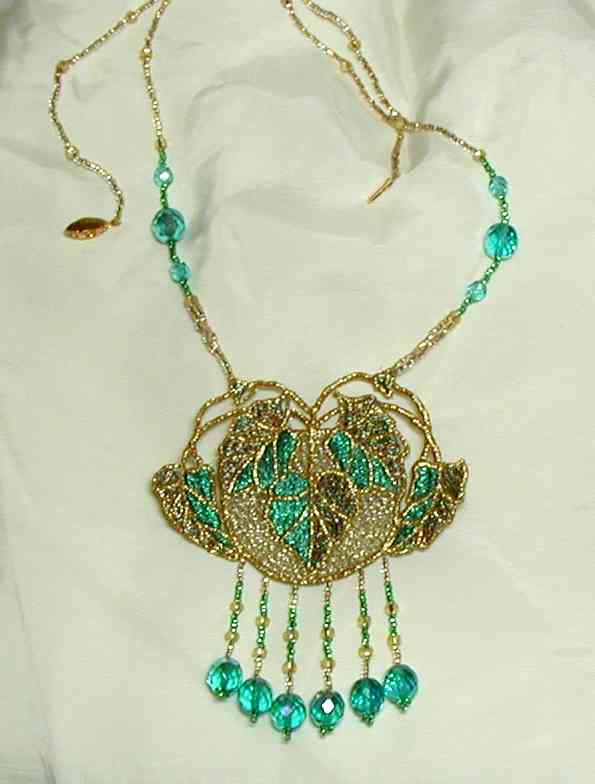
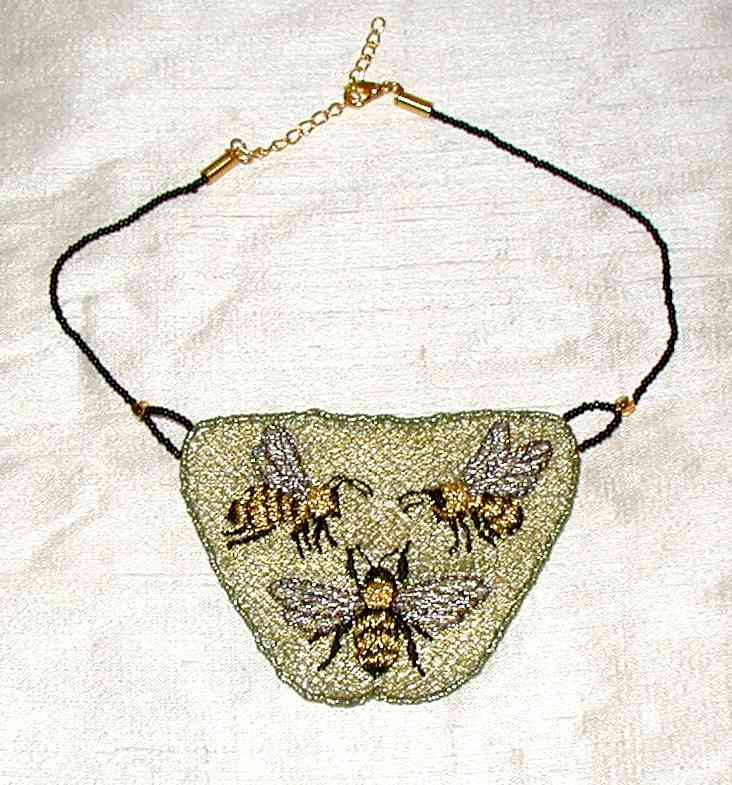
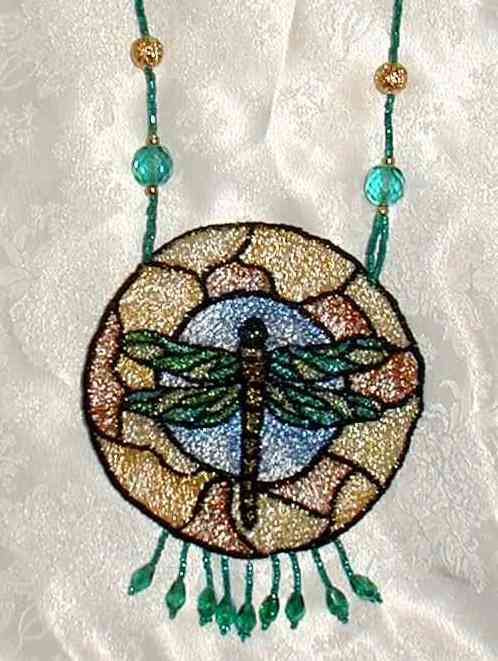
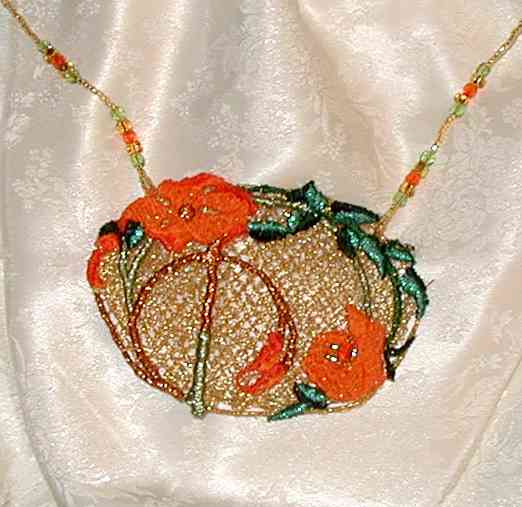
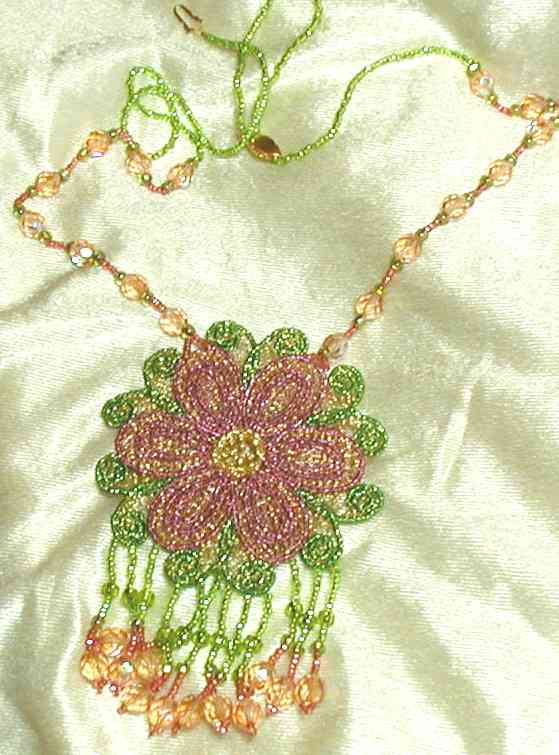
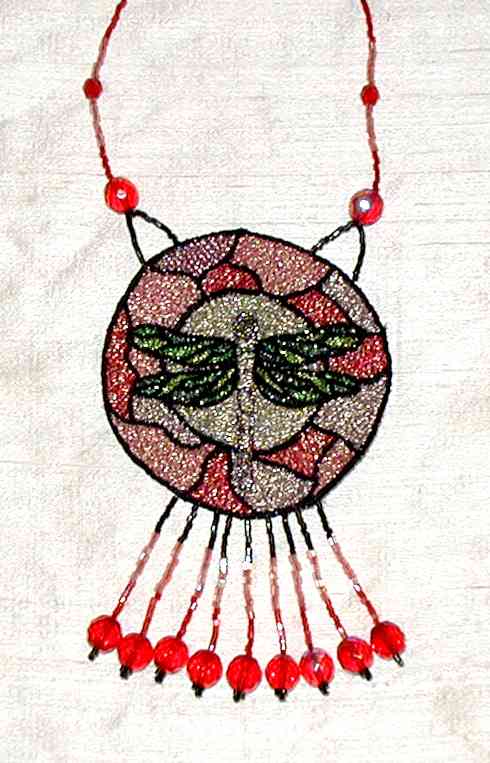
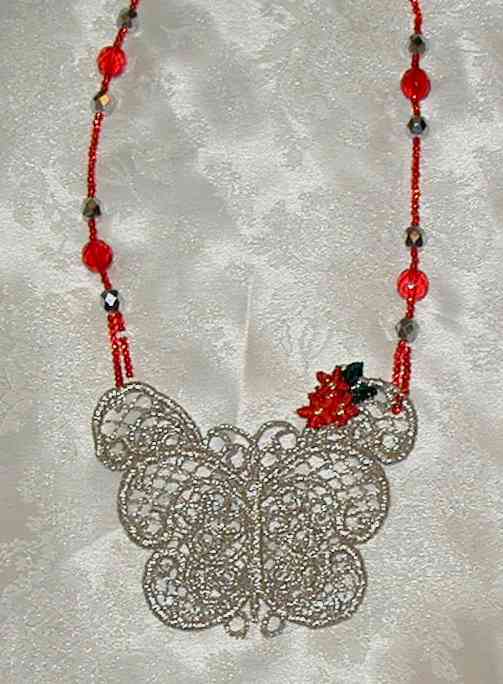
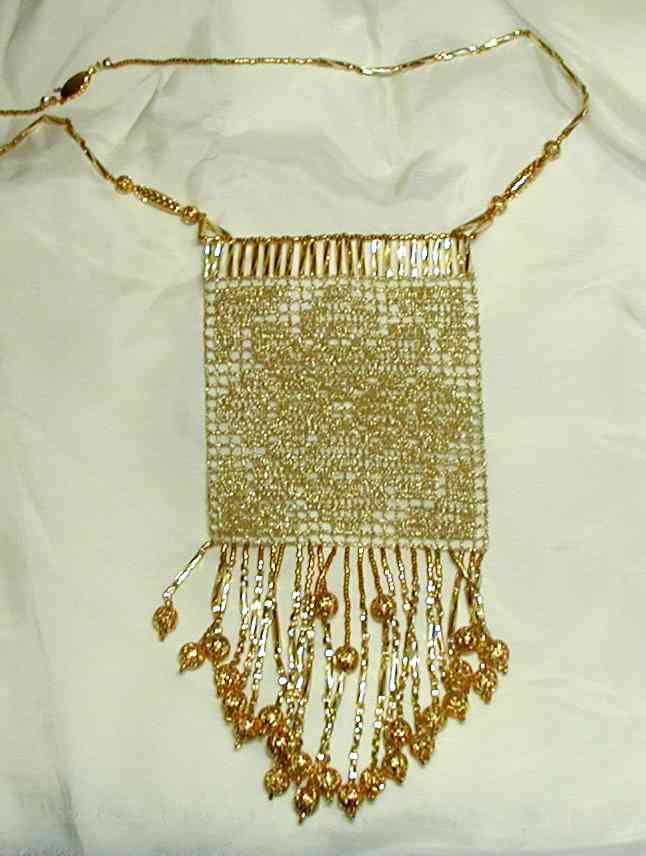
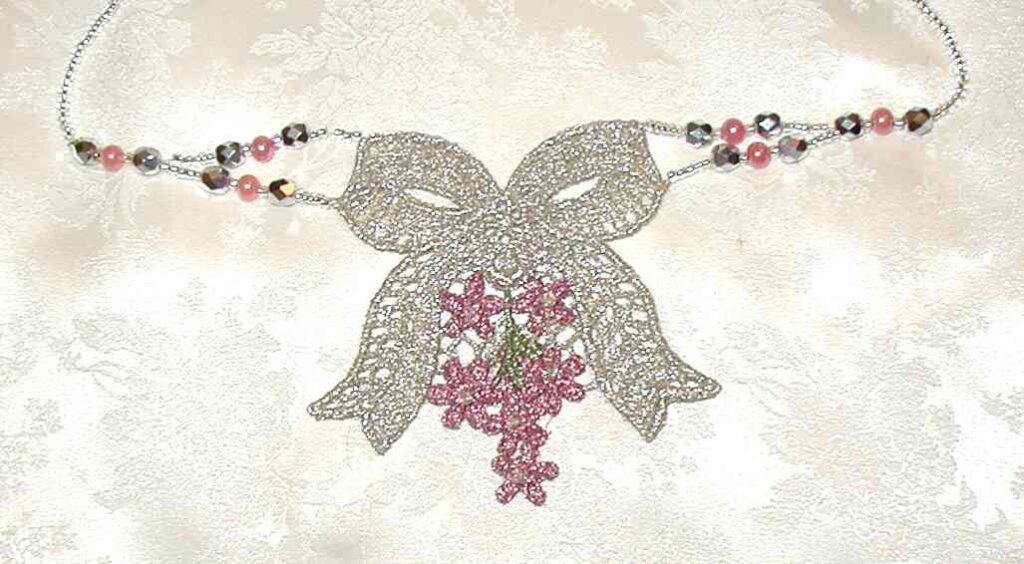
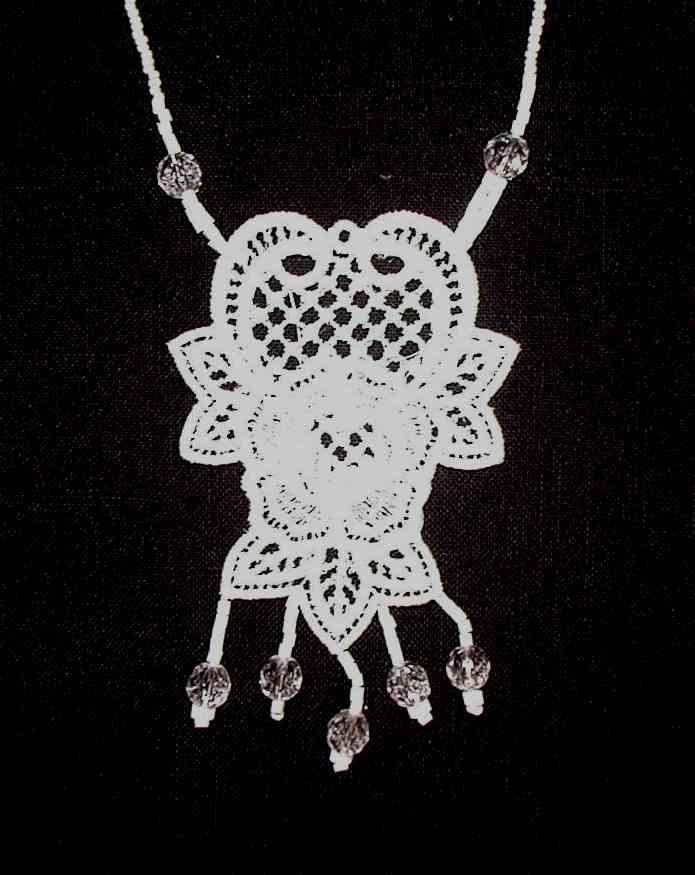
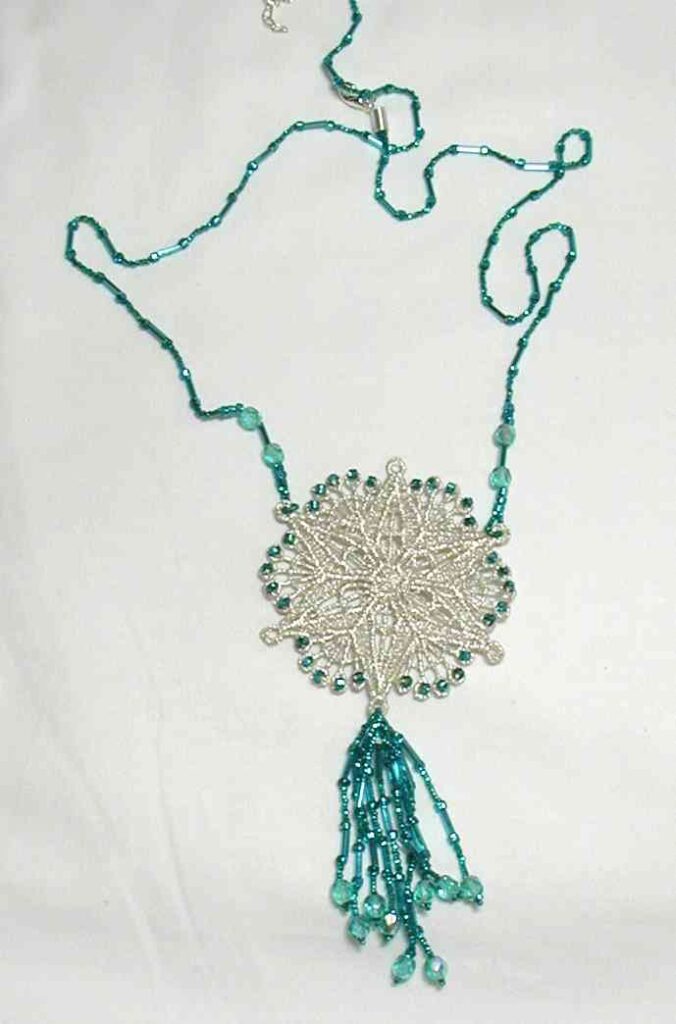
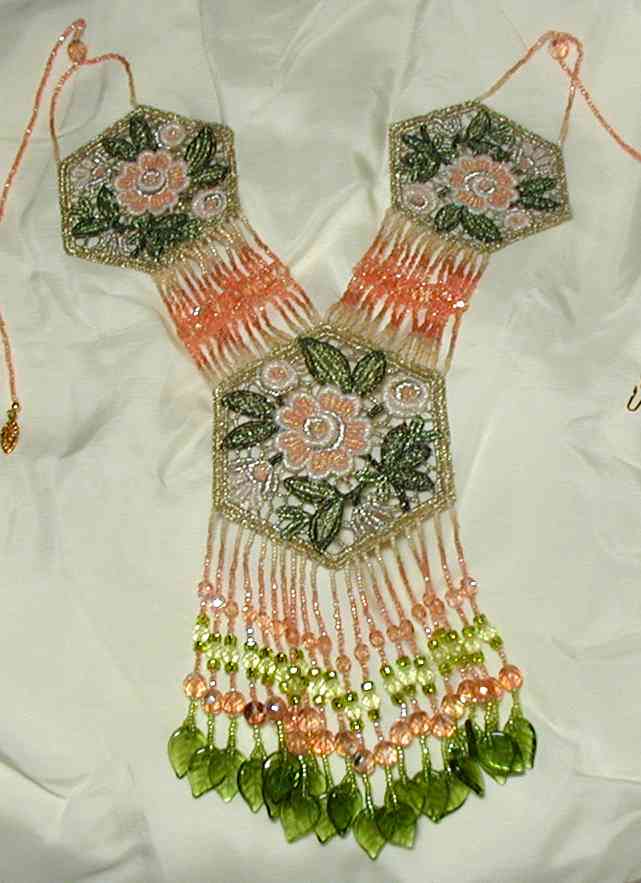
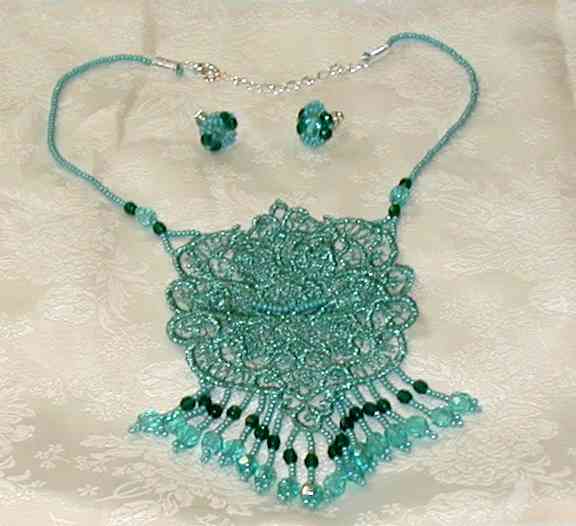
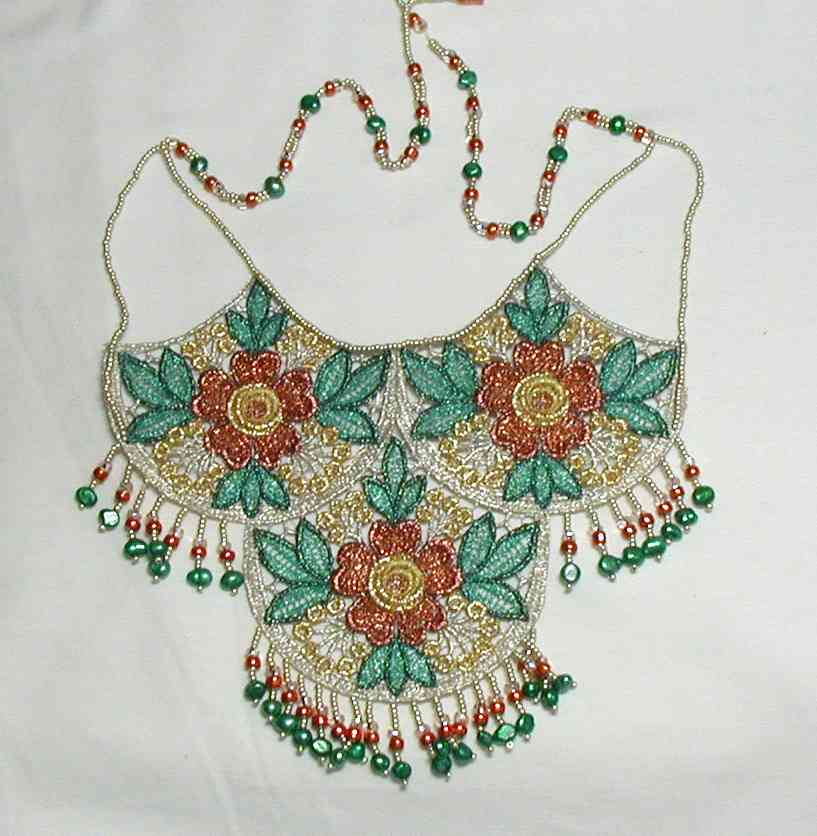
I was very much into beading before I started machine Embroidery.  I thought I would show you some of my necklaces – you can see where I started incorporating Free Standing Lace Embroidery into my beadwork!  Experiment with combining crafts you love.

Beads are easy because there are so many ways to add beads to your embroidery.  You can go all out as I did below and make jewelry from your embroidered Free Standing Lace Medallions, or dot beads (sew them or glue them) around a fantasy embroidery to add sparkle to the sky or ground or add to the characters costumes.  Add fringe at the bottom of a wall hanging with beads the colors in the embroidery.

If you like yarn, this too can be incorporated.  You can crochet or braid a necklace cord for a medallion.  Add fringe to a wall hanging – with or without beads.  Cut small pieces of appropriate fluffy fibers to add to the landscape of an embroidery.  Outline by couching an appropriate fiber or yarn around elements in the picture.


OLYMPUS DIGITAL CAMERA


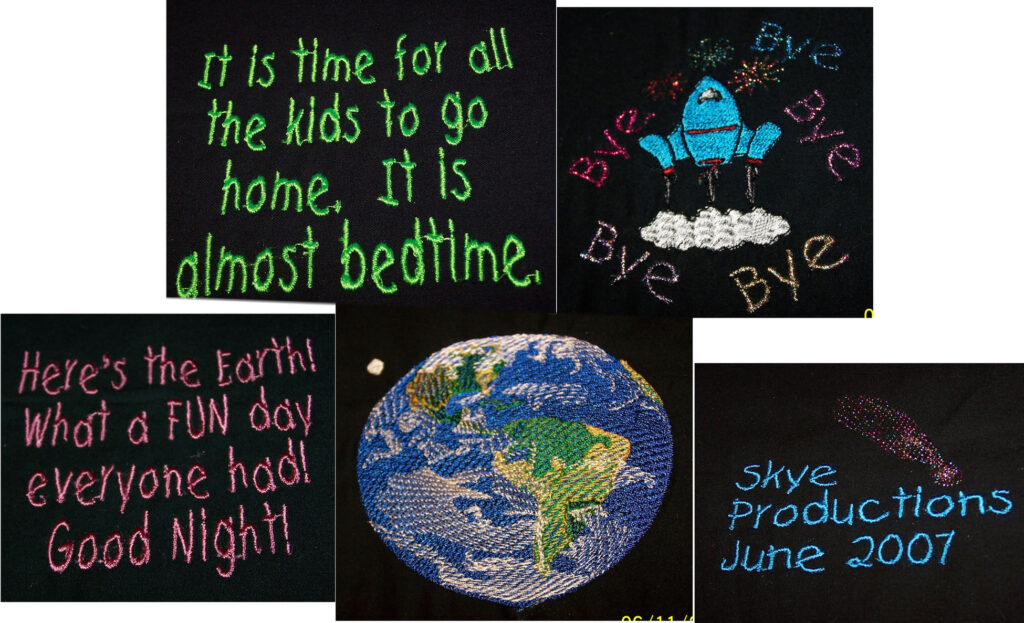
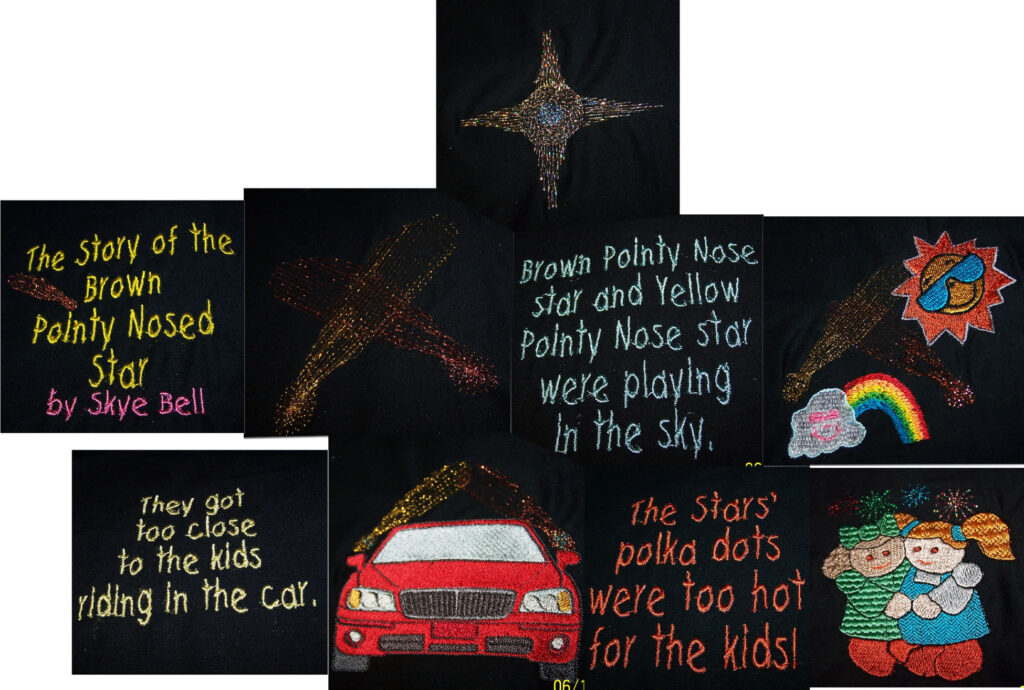
Renee and Skye’s Outer Space

We were discussing constellations and outer space and this was written by Renee:

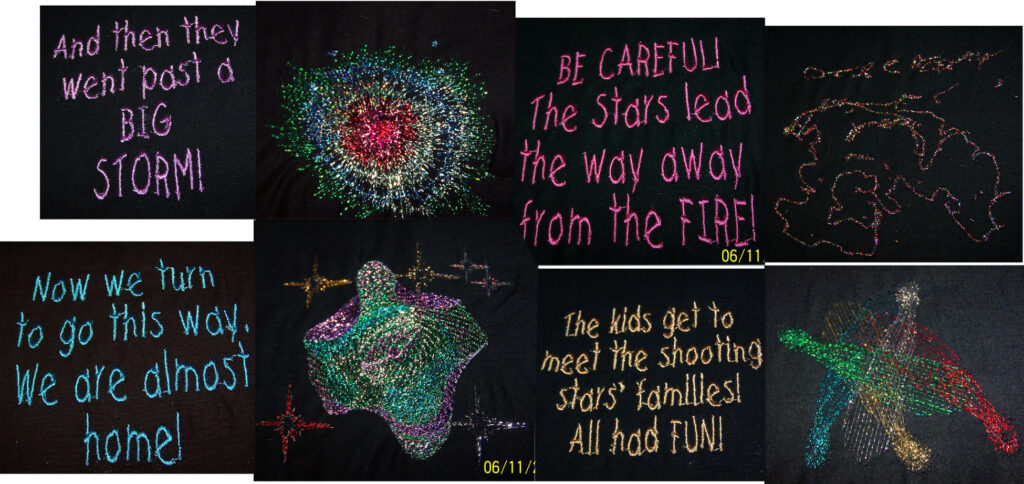
These include some designs from elsewhere on here also, but this was very special. Skye had a dream one night, and told me about it, I wrote it down. THE NEXT DAY you posted the outer space designs and when Skye looked at them she said YES GRAMA! Those are the pictures of my dream! So we made her ‘book’. The ‘fire’ one she designed herself. And she was 3.5 at the time. 🙂 This is the Outer Space designs.

Renee, Skye and I have been friends for many years through BFC.  Skye is off to college this year!!!

BFC0579 Outer Space

I think we can take a great idea to help our children develop their creative size.  I can think os several ways to do this.  One is to look through designs with your child and ask for their thoughts and opinions.  Make note of ones they really like and what they say about them.  Another is to give them a topic – might be pets, family – or Outer space – and look through designs with them for things that express the topic.  Again record their choices and write down what they say.  You can make a wall hanging, or a book of the results.  It would be great to look through as they developed new ideas!

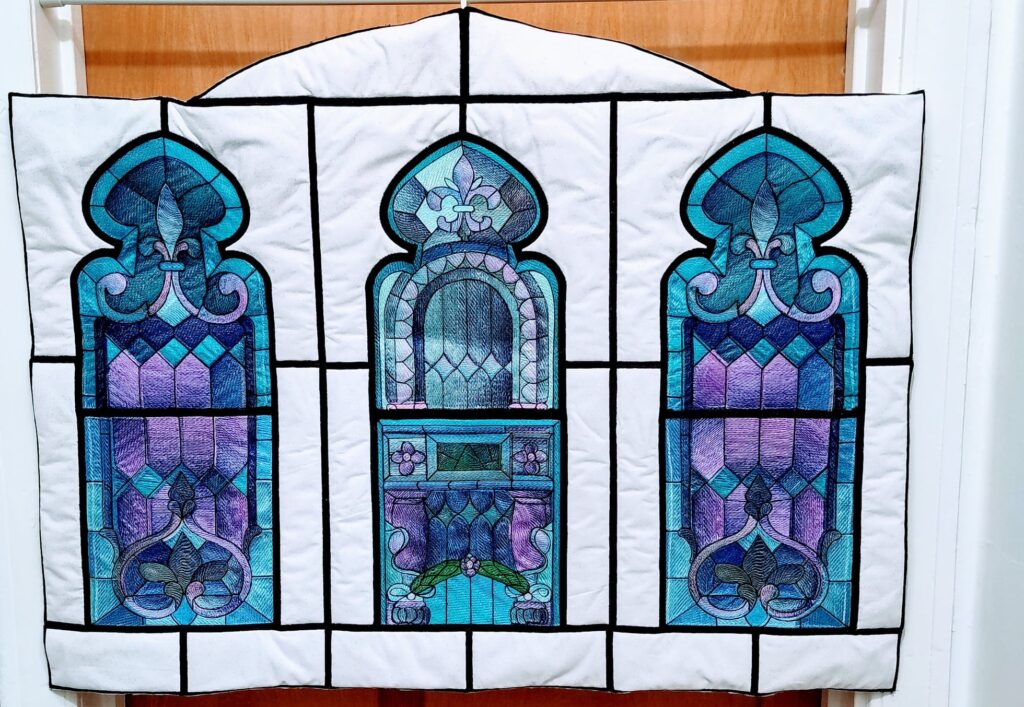
Tzu’s version of Kentucky Triptych (with great hint)

From Tzu:

I’m happy to say I’m finished and even with my boo boo’s I absolutely love it ! my learning curve has taught me several things for my next one . Oh and while Im no where near y’alls level 2 things that greatly helped me and I quickly figured out was 1 while sewing panels of all embroidery together was to use quilting gloves the grip you get is fantastic and it never hurts the embroidery at all making feeding it to your machine a breeze , # 2 while my feed dogs and foot worked together the grip of my foot seemed to ever so slightly mis-align my pieces from bottom panel well a teflon foot ( I know supposed to be for leather lol ) stopped all the misalignment hope this helps someone 😉 . Here is my version of Kentucky Triptych

Tzu has not only come up with a beautiful version of this design but also given us a great hint for all designs that require stitching together.  Fantastic!  I’m going to use this next time – I always have at least one seam that no matter how hard I try gets a little bit *off*.

BFC1285 Kentucky Stained Glass Triptych


TUTORIAL: Beaded Embroidery – How to get started

This is a tutorial to get you started adding beads to your embroidery and other projects.  It uses our Embellished Colorful Butterfly as an example.

You can download the Tutorial or read it below.

Tutorial for Beading Embroidery for Beginners

The purpose of this tutorial is to introduce you to beading an embroidered design. This could be on a garment, a picture or home décor items.   I will be using the Butterfly from set BFC2000 to illustrate some ideas for adding beads to an embroidered design.
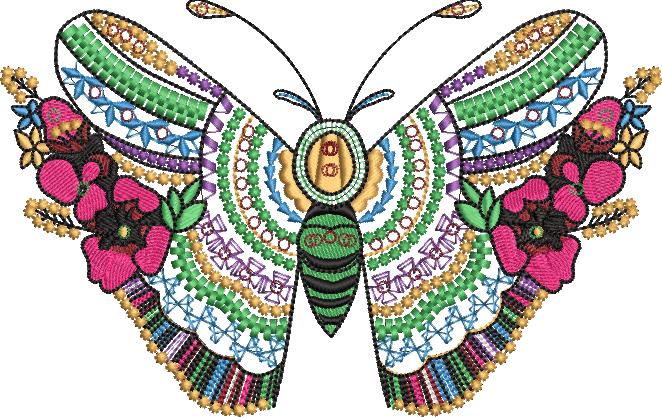
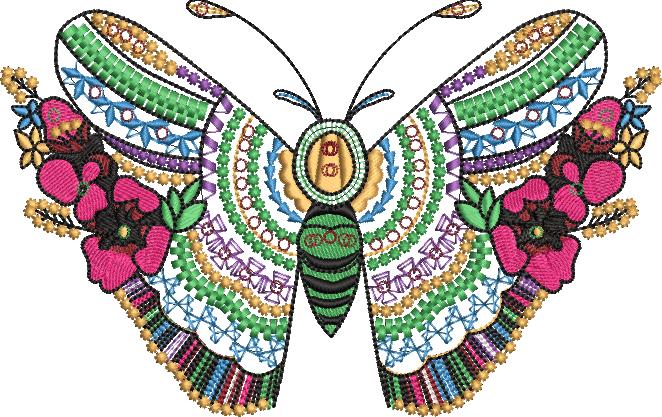
Below is the design without any beading.  This type of design is good to start with because it has places easily defined as to where to put beads!  An all over solid design is more difficult in two ways.  Figuring out where to add beads and it might be difficult to get the needle through the more dense stitches.  This doesn’t mean you can’t use solid designs, but if you’re new to beading, I think something like this butterfly is much easier to start with!

STEP ONE:  GATHER YOUR MATERIALS

  1. Choose beads in an appropriate size for your design. I used the large design of the butterfly and mostly size 5/0 Japanese Seed Beads. This size bead is 4mm x 5 mm. To add dimension, I used 3/8 inch Czech crystals for the head and body. You can always use smaller size beads but remember the smaller the beads, the more you have to put on the design for them to show up!  J If you’re starting out, stick to the larger beads like these.  Here is a great chart showing the relative sizes of beads:  https://www.allfreejewelrymaking.com/Jewelry-Basics/Bead-Size-Chart

Some places to get beads – thrift shops often have old clothes that have beads on them, old costume jewelry or look for multicolored offerings at bead sites or shops.  https://www.firemountaingems.com/ is a fantastic source.  Go there, click on beads and then on assortments.

  1. Beading Needle and Beading thread. Beading needles are long and fine with a long eye.  Make sure your needle will go through your beads. You shouldn’t have any problems with the size listed above, but when you start getting smaller beads, the hole can get very small and require super thin needles.  I would avoid these when starting out.
  2. Choose fabric that allows your needles to go through it smoothly. Some fabrics, like those with any vinyl or glittered surfaces or very dense fabrics can be difficult to get a needle through.  Make life easier to make sure the needle slides through your fabric before starting your embroidery! Cottons and Linens are always good.
  3. The same principle I’m describing here can also be done with glue. I recommend E6000 glue.  It does a great job of holding things together plus it has a narrow tip that allows you to put just a tiny bit of glue without making a mess.

STEP 2: PREPARE    A PLACE TO GET STARTED

I can’t emphasize enough – BEADS ROLL EVERYWHERE! You can’t be too careful with them.  I’ve been beading for a good 50 years.  Yet – yesterday when I was getting beads for this project, I took a large vile of beads to see the color better and the cap was loose and beads went everywhere!  They really bounce on vinyl flooring. A little extra caution can save a LOT of time in the long run.

So – I recommend using a tray of some sort to hold your beads while you work on the project. Another option is a tin of an appropriate size.  You will need something to place some beads on so you can pick them up with your needle.  Good options are a piece of felt, velvet, foam, anything that doesn’t allow them to roll easily  When I was beading all the time, I took an old mouse pad (they were thick rubbery stuff back then) and put a bead of textured paint (the kind that left a 3D look).  This was enough to contain the beads.  They sell things for this, but I’m sure you will be able to find something you already have that will work.

I recommend if possible having a place you can keep the beads and your project together without them being disturbed. If this isn’t possible find a box to hold everything that you can put away out of harm’s way.


Now you have to go get a cup of coffee or tea and take a break! J

START BEADING

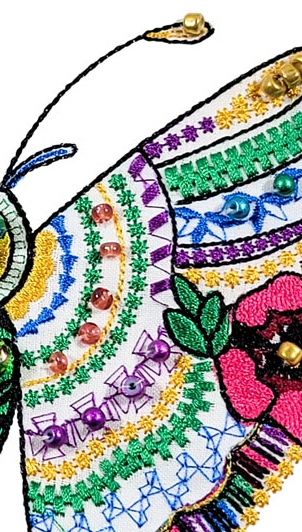
  1. Here is a diagram where I added beads.  The dark red circles and the green circles are where I stitched the beads.  These aren’t the only places, so feel free to experiment. And while working on a beading project it is always good to look at your project form a distance.  You will be able to tell when things might be getting out of hand
  2. Look at your design and decide where to start.  Look for sections that give you a *guide*.  I started with the blue decorative stitching because it had very defined places I could add a bead. Look at the picture below.  There are three rectangles going across the blue stripe.  This is where I will put the beads.
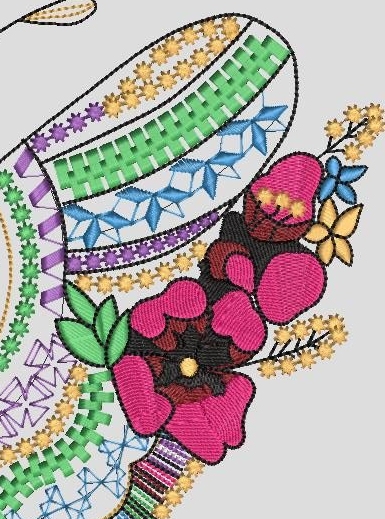
  3. Thread needle.  I double the thread and tie a knot at the end.  Bring your needle up from the back to the top side on one side of that little rectangle. Put a bead on your needle and put the needle back through the rectangle top to back.  Bring the needle back up in the next rectangle and add another bead.  After the third bead there are two options.  If there will not be a backing on your project, neatly tie off your thread.  If there will be a backing, you can just go onto the next bead being careful not to pull the thread too tight.
  4. I chose the purple run of stitches next.
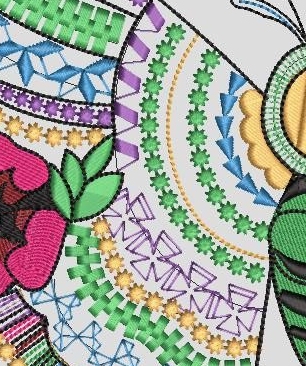
This time I chose the center of the crosses – so there will be 4 beads across.  Repeat the blue and purple beads on the other side of the butterfly. Look at the picture above and you will see the third purple bead shows hole.  I didn’t notice this while I was stitching, but I think I went through it twice (you can see the two white threads on the bead.  It is worth taking the time to look well at each bead to make sure you won’t have to go back and fix as I will for this.

HINT:  If I want to go back and fix that bead, I will probably have to do the entire row of beads because once I cut the thread, they will all come off.  Here is a hint.  Beads are usually glass and will break.  BE VERY CAREFUL DOING THIS!!!!! Take pliers, hold the bead in the pliers and cover it with a cloth.  Squeeze the pliers enough to break the bead.  Remove the cloth and shake the design over a wastebasket.  You have now eliminated that bead and can add a new bead in the same place. This may be difficult to do if you are using larger beads, but I’ve used this trick many times when making projects with lots of beads.

GOLD BEADS

Gold and other metallic beads always add a lot of Bling.

I started with the center of the big flower.

Using the same method, up through the back, put on bead, down to the back again, add your first gold bead.  I next put one in between the two flowers at the intersection of the petals.  The third was in the top petal above the gold candle-wicking stitches.  Next I jumped to the gold and purple candle wicking.  I started at the top of and inside the gold candle wicking.  I brought the needle up, threaded 3 gold beads on my needle and went to the back

NOTE:  If you are using smaller beads than the 5/0 you can do several at a time.  Come up through your fabric, thread 4 or 5 beads onto your needle and go back down through the fabric.  When done with a row made up of several groups of beads, you can thread your needle back though all the beads, pulling them together a little.

I added gold beads to one of the antennae, a row of them on the outer side of the first green strip, in the flowers and on the candle wicking of gold and purple.

GREEN CRYSTALS

I added two of these to the body and two to the head.  They are stitched the same but I go through the larger beads twice to make them more stable.  These are quite large beads.  Crystals come in many sizes from very tiny to very large.  They can add a lot to a beaded design.
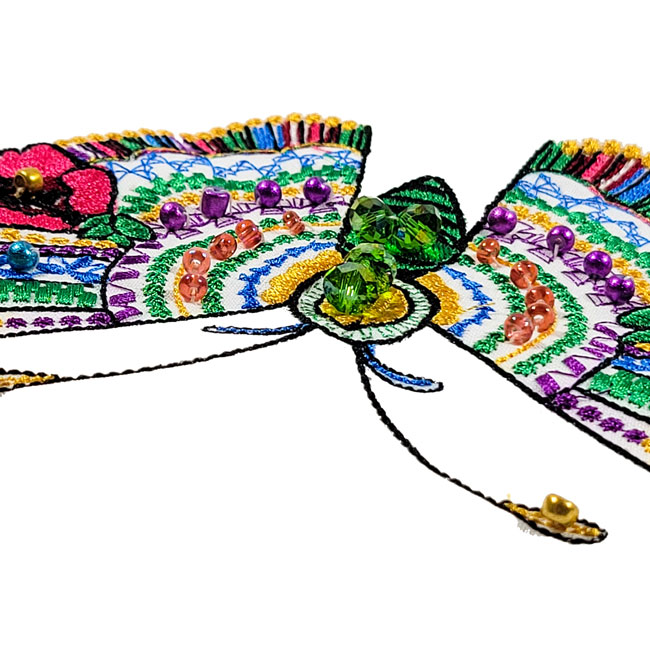
FINISHED DESIGN

Don’t hesitate to contact me if you have any questions – Suz Suz@BFC-Creations.com
Beth’s method for finishing embroidered pictures.

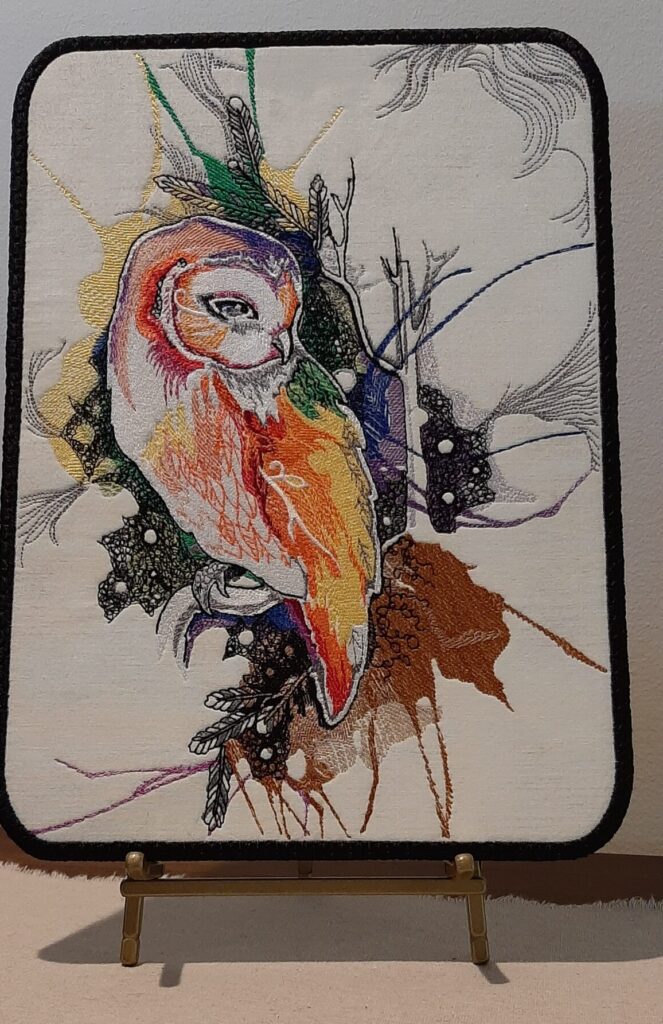
Beth has been so kind and generous to write out directions on how she makes such beautiful finished embroideries that she displays on easels.  You can see some of them here.

Thank you so much Beth!  Download in PDF form:  BethPictureFraming

Procedure steps and tips for creating embroidery pictures using Pellon 71F ultra firm one sided fusible and Pellon 926 extra firm non-fusible stabilizers.

FINISHING EMBROIDERED PICTURES

It is best to use either an 80/12 or 90/14 topsitich needle.

Basic directions
1. In software combine embroidery design and border (frame) design. It does not matter which of the two designs is chosen first.
a) If more than one embroidery design is to be combined before adding the frame design, it is helpful to sequence the order of stitching in the software but moving forward and back through color stops in the embroidery machine to achieve the correct stitching order works as well.
b) It will be necessary to move forward and back through color stops to stitch the frame for the embroidery picture.
c) Edit the size and dimensions of embroidery design and border/frame design independently as necessary before joining them. Once combined as a new design, the dimensions can be adjusted further as desired.

2. Hoop one layer of water- soluble nonwoven fabric- like stabilizer.
a) The best success stitching on fusible pellon is achieved by opening the bottom hoop enough that the stabilizer can be hooped smoothly without pulling it at all. Just smooth it by hand before tightening the frame. The stabilizer should be straight in the hoop, not pulled “tight as a drum,” however, tighten the hoop frame as much as possible. Pulling at the
stabilizer to smooth it after the hoop is tightened only serves to make it crooked. The stabilizer may seem to be too loose, but it will work better stitching on pellon.

3. Stitch the first color stop, used for the border, for the placement of the fabric fused to pellon. a) Cut the pellon, front and back fabrics at least 1.25 inches bigger that the dimensions of the finished border. This will allow a little more than ½ inch to hold on to while trimming the outside away. More allowance may be preferred.
b) Pellon is not 100% uniform. It does have a little loft. This is not usually a big problem. Just be aware that as the design is stitched the pellon will often flex in the hoop. It is a good thing to have the stabilizer a little loose and not stretched tightly in the hoop, especially with densely stitched designs. Ugly creases will be avoided. Let the pellon become wonky. The design has
not been ruined. The action of additional stitching will often smooth everything out. Attaching the back will also help flatten everything. In any case the picture will press flat when completed.
c) Lightly fuse the fabric to pellon. Works better with dense stitching.
d) It is better to use fusible pellon for both the front and back fabrics if the designs are large or
when a very firm picture is preferred. Attaching the back using non-fusible works well for small designs. Quilt blocks using trapunto or quilting stitches look good using non-fusible pellon on the front and fusible on the back. With non-fusible the fabric may noticeably “float” around
stitched designs. Experience and every design will dictate pellon choices.

4. Center the fabric fused pellon in the placement stitching. Stitch the second color stop to tack it down to the stabilizer.

5. Move to the embroidery design and complete the embroidery. Remember that it is better to allow the complete design to stitch without interference. It will probably be wonky, but not to worry. After the stabilizer is washed away and the picture dries, it will iron flat.

6. After the embroidery is completed, remove the hoop from the machine. Turn the hoop over, center the back fabric over the placement stitching and secure it to the stabilizer with pins. If non-fusible pellon is used with the back fabric, it is helpful to pin the two together in the center for a smoother fit.

7. Return the hoop to the machine and stitch the border design color stops one and two to secure the back fabric.

8. Remove the hoop from the machine and on a flat surface trim away the excess fabric/pellon From the front and back.
a) Start with the back.
b) Very sturdy double curved applique scissors are extremely helpful. Pickle Pie Designs sells an excellent pair on their website www.picklepiedesigns .com.
c. Trim carefully as close to the stitching as possible. Avoid cutting the stitching or the stabilizer. If you do cut the stabilizer at bit, pin another piece of stabilizer over the cut to patch the area. The remaining color stops need something to stitch on.

9. Complete the remaining border design color stops.

10. Remove the beautiful, embroidered picture from the hoop. Place it in warm water to dissolve the washaway stabilizer and rinse the excess away. Stand the picture on edge (like in a dish drainer) to allow the water to drain. Do not worry if it is wonky but take care not to bend the wet pellon. After the picture is dry, steam iron it flat using a pressing cloth to avoid damaging the embroidery. Any noticeable wrinkles can also usually be ironed away.

Enjoy many pictures displayed on an easel. Another option is to tack one side of a small metal ring to the back and hang these pictures on the smallest wire “Command hooks”.


Beth’s Embroidered Pictures

Beth has developed a wonderful way to finish large picture embroideries!  She has given me permission to include her method and i’m sure a lot of you will appreciate being able to do this too.

From Beth:

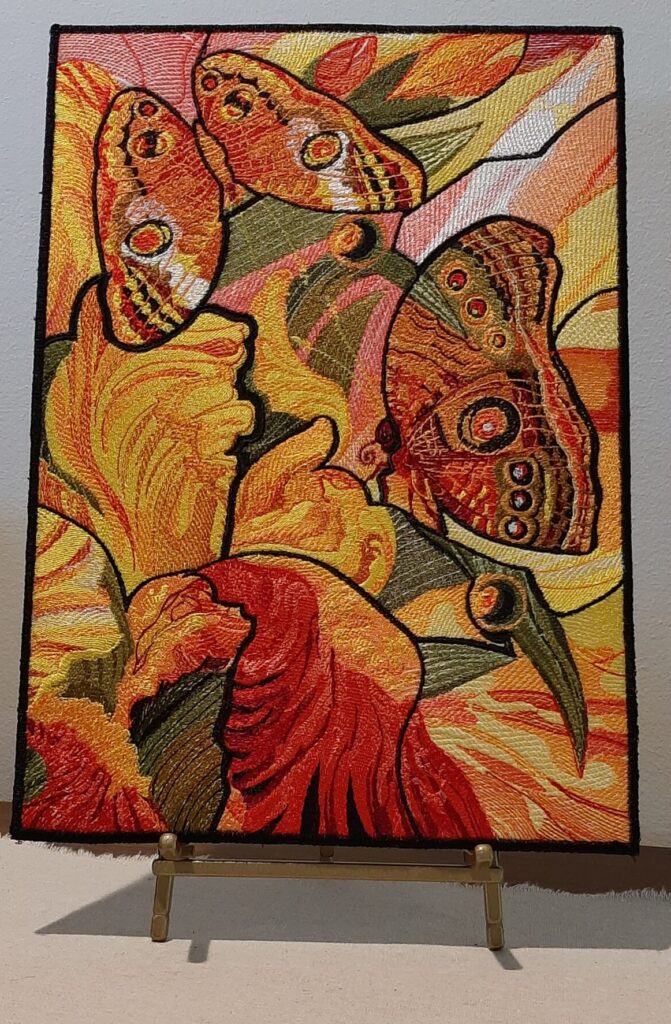
I finished the BFC580 design and thought you might like seeing what I did.  I combined the six sections in software, added an  edited design to create the inside window frame to complete the look of a window.  I have a Babylock Destiny and Designer’s Gallery software. This software gives me the ability to combine designs very well.  Also attached is a jpeg of design BFC1601.  Zigzagging the sections together did not appeal to me so I combined them into one design.  Added together there were 305506 stitches and I wasn’t sure it would work, but you can see that it did, and computers didn’t crash.

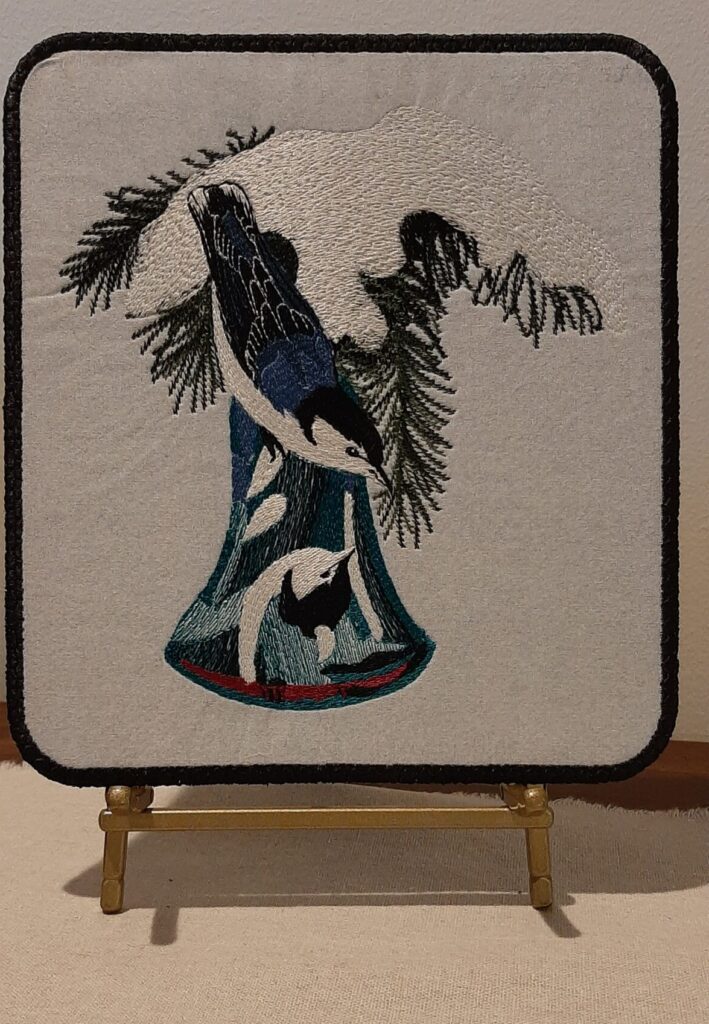
I am embroidering pictures like this on fusible pellon. For large projects I also fuse the back fabric (usually black) to pellon and then sew the front and back together along the edge to make it very sturdy to put on a table top easel. After the front and back sections are sewn together and trimmed to size, the edge is satin stitched to finish.

I am an experienced embroider and I have made many embroidery designs into pictures to display on an easel. My limitation is only the size of my magnetic 9.5 x 14 hoop.  For the tabletop easel I wouldn’t need something to be any bigger.  I like your designs very much.  I also like the thread you sell so much I bought every color. Your “Blue Study with Birds” would not have been possible without all of your blue threads.

I have not been bored sequestering at home during the pandemic.  I am blessed to be able to enjoy a creative hobby like machine embroidery, and talented people like you are included in the blessings.  I am not talented, but I have learned a skill. I can thread a machine, step on the gas, and thoroughly enjoy being creative.  I retired in 2011 and I don’t think there have been many days that I haven’t spent time at my machine.

It made me smile when I read that you would like to put my embroidery pictures on your blog.  It’s not often that you can show off something creative that you love to do to kindred spirits who would share the same creative interest. This technique for making embroidered pictures to display on an easel began just before the world was told to sequester at home to prevent the spread of the pandemic.

Surfing Youtube in December 2019  I came across a New Zealand web site, www.kreativekiwiembroidery.co.nz.  Heather calls herself a machine embroidery addict enabler and she digitizes large ITH table mats and mug rugs using pellon and water soluble stabilizer. I was intrigued, bought a design, and quickly realized that the very sturdy edge she created for these designs would work, with a little editing, to make frames for embroidered pictures.  The sturdy edge would hold up with lots of handling and abuse. and the pellon would be sufficient support on an easel.  I have been collecting designs that would make beautiful pictures for decades and now with a few inches of fabric, pellon and water soluble stabilizer, Heather has enabled me to be able to make many pictures to display and enjoy in my embroidery machine.  At this point I have made over sixty pictures using quilt blocks, applique and embroidery designs.  They don’t take up very much room to store and I can change pictures to display quickly and as often as I want to.  Seasonal designs have become a focus decoration, but I display something all of the time.

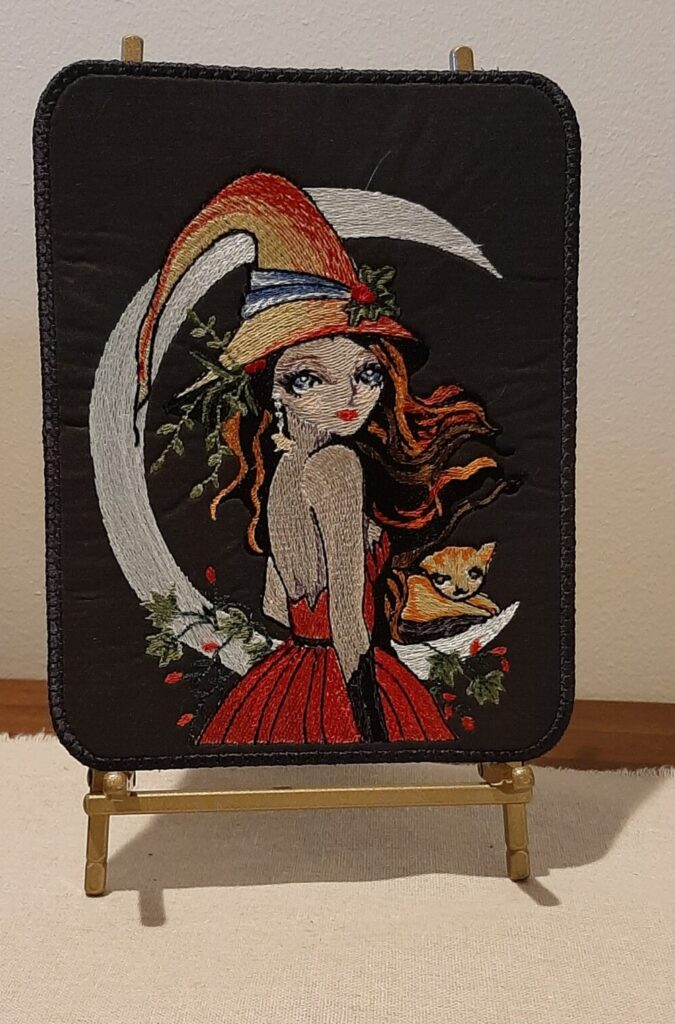
For frames I use Heather’s 8X10 ITH rectangular coaster (ITHRC).  I edit out everything but the edge which has a placement stitch thread run, tack down thread run, and a third thread run for extra security that is stitched before the face fabric and back fabric are trimmed away.  Then a zigzag stitch and final satin stitch topped with the decorative stitch is sewn to finish.  The witch and Christmas bird are examples of this framing.

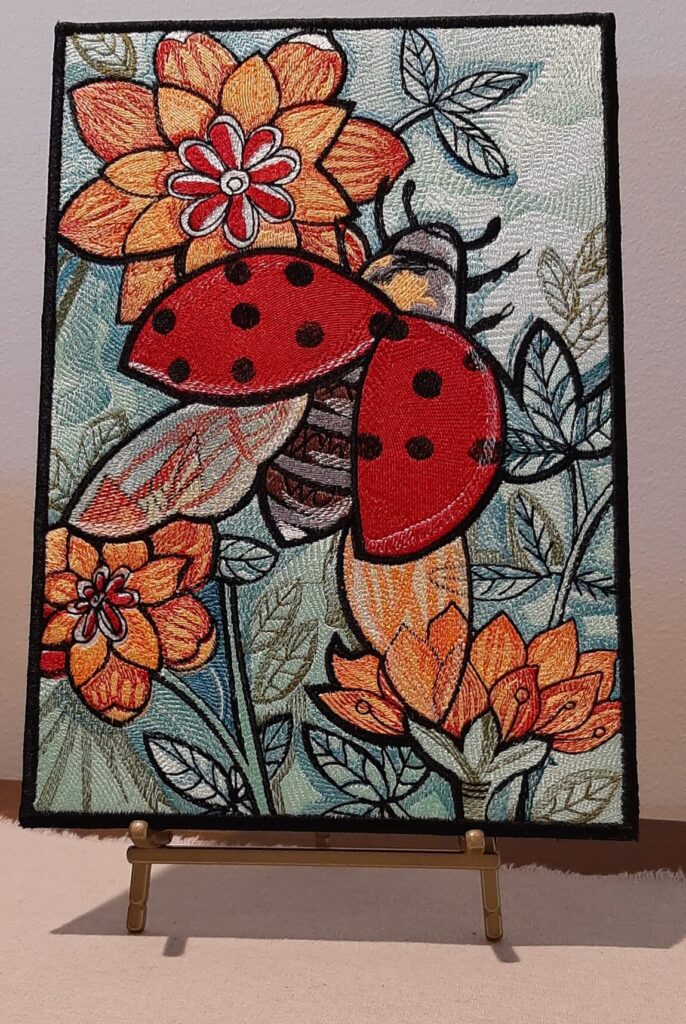
This framing design has rounded corners and being circular is resized easily without distortion.  I have not been able to find a framing design with 90 degree corners that will resize very much without noticeable distortion, meaning the width of the top and bottom of the rectangle may be wider or more narrow than the sides depending on how dimensions are altered.  If a picture requires a square corner I manually stitch the satin stitch edge.  The attached Ladybug design is an example of my manual edge.

In the software the edited frame design is added to a selected embroidery design.  The frame dimensions are adjusted to fit with the embroidery design and the two combined and saved as a new design. Resizing the embroidery design is also works.  I usually use one layer of water soluble stabilizer and I only use the nonwoven fabric like wash- away stabilizer.  I prewash my face fabric and back fabric to avoid possible shrinkage causing problems.  Pellon cut from a bolt will usually need to be ironed flat using a non-stick applique pressing sheet.  I found it’s best to use a light fuse, no steam, to fuse the face fabric to the pellon to avoid hard wrinkles.  Very dense designs can cause distortion if the fabric is bonded too tightly.  Any problems can usually be steam ironed away as the design is pressed flat after drying.

The embroidery is completed before the back fabric is attached.  To make the back of the picture look the best I prefer to pin the back fabric to a piece of non-fusible pellon before securing it to the back of the hoop.  I use 4 flat head pins to secure corners of the back fabric, not tape.

I re-run the placement, tack down and securing thread stops to attach the back fabric.  The hoop is removed from the machine and the back fabric is trimmed away first. After the face fabric is trimmed, the hoop is back on the machine to complete the zigzag stitching and satin stitching. The stabilizer is dissolved and thoroughly rinsed. away and after drying the picture usually requires a little steam ironing to flatten.

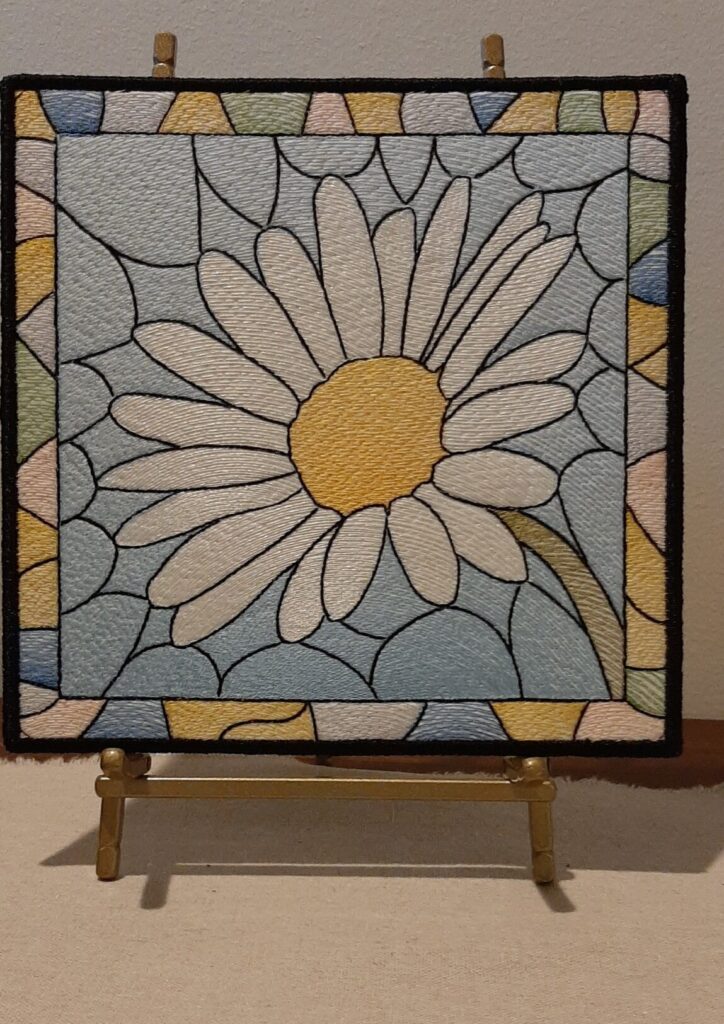
Your Stained Glass daisy design was easily adapted for displaying on an easel.  After centering fused fabric with pins all of the colors were sewn except for the black stain glass stitching.  To be able to add the back fabric I just had added a color stop in the software at the point where the black stain glass stitching moved to the edge.  By moving to and repeating the added color stop, the back fabric could to be attached and secured before the fabric was trimmed away and the edge completed. Depending on how designs have been created or combined it is often necessary to move forward and back through color stops as necessary to achieve goals for creating a picture.

I hope this information is helpful and clear.  Please use and edit as much of it as you see fit in your blog.

BFC1204 Ching Chou’s Barn Owl

BFC1567 Ching Chou’s Stained Glass Ladybug


BFC1202 Ching

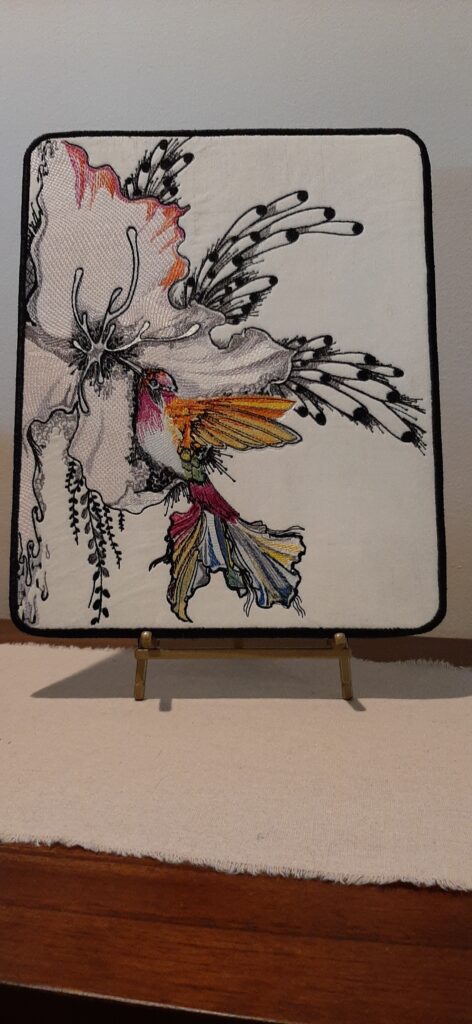
BFC1202 Ching Chou’s Hummingbird
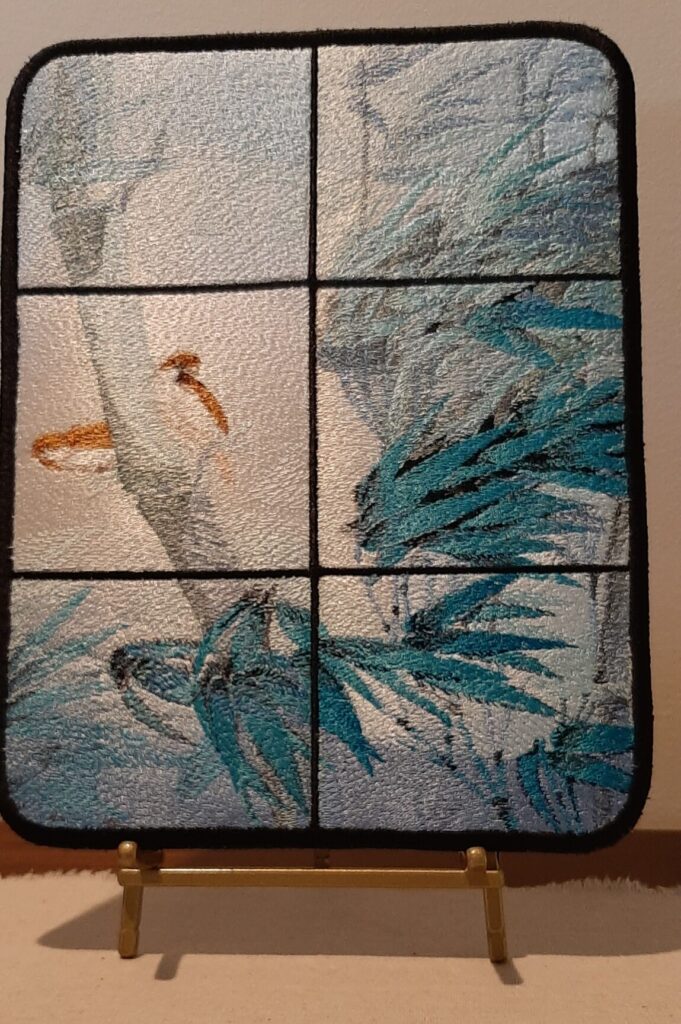
BFC0580 Blue Study with Birds

BFC1005 Fantasy Ladies – Fairy Witchery


BFC1481 Stained Glass Floral Squares


SAVE YOUR DESIGNS!!!!!!

A customer wrote to me today with a heartbreaking story. I will let her tell you:

Dear Suz, I just finished re-downloading ALL my orders since #521. I had a severe power surge here in August that caused me to lose my stove, refrig., furnace, air, PC, water softener and elec. fireplace. I thought I had everything backed up on CDs and memory sticks, BUT Murphys Law was in total control and I had NOTHING. I am SO GLAD that I could salvage my favorite designs and can only say THANK YOU THANK YOU THANK YOU that I could. I remain FOREVER a loyal customer,

Suz, feel free to  use  my tale of woe. I thought I  had taken the proper precautions but I  never checked to make sure. I just  assumed that I  had copied everything.  NEVER ASSUME anything.  That’s  my  new motto. I should have known better.  Since the love of my life (husband of 55 years) died of cancer in 2014 it seems like Murphy’s Law has been hanging over me big time. Thank God my 4 daughters have been here to keep me going.  Thanks again for your kindness.

_________________________

Designs represent not only a big monetary investment, but many of us are very attached to our purchased designs  – we plan for them, think about them, and we expect them to be there when we want them.  But unless we take some precautions we can’t be sure this will be the case.  PLEASE make sure all your design are backed up and that the sites you deal with maintain your purchases so you can re-download them.  If you have a lot of designs from many places you might want to consider a cloud service that will back up the files you want them to every night.  I have been doing this for years and I have had to use the backup files often enough to feel the service has been a bargain.

My Mixed Media Experiment

DOWNLOAD TUTORIAL

TUTORIAL: MY EXPERIMENT IN MIXED MEDIA

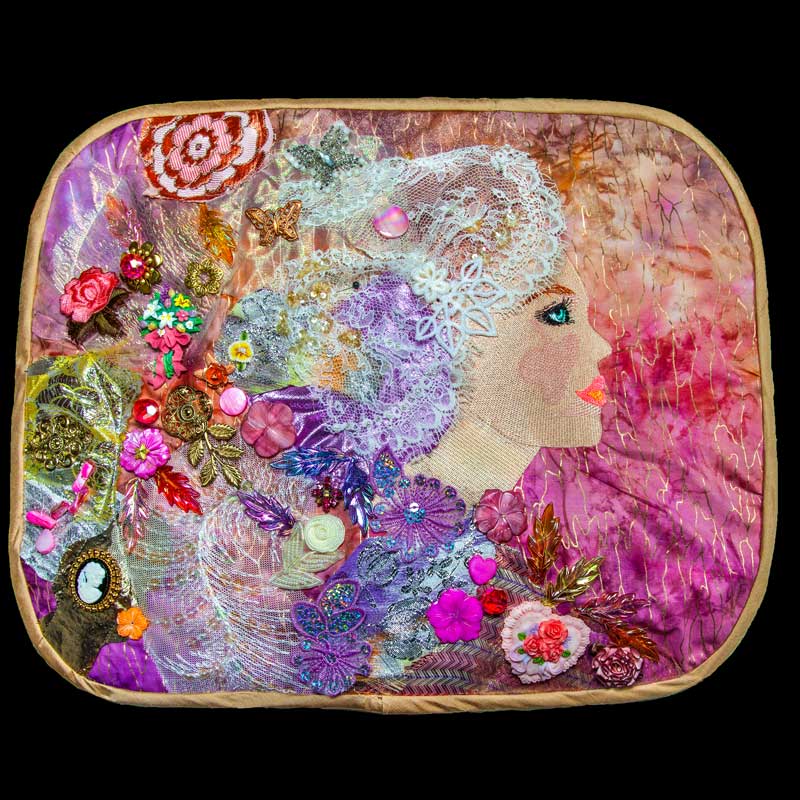
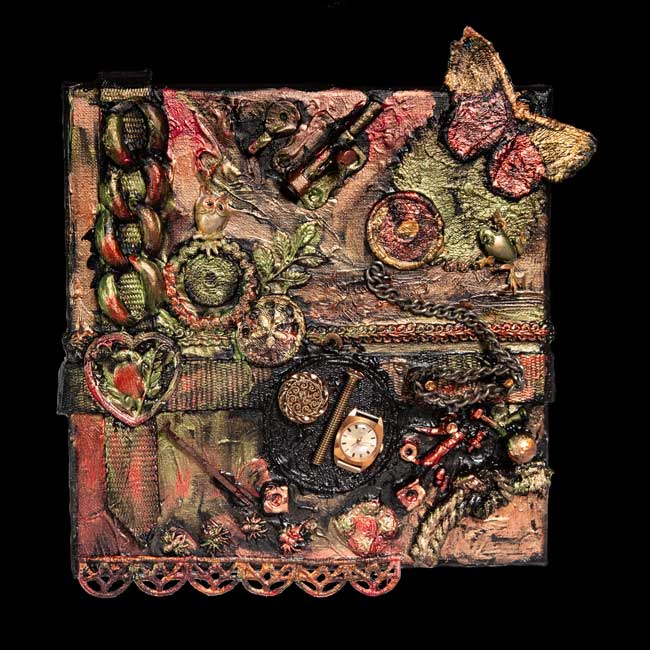
I’m fascinated with mixed media art but have little time to delve in the way I want to.  But I decided I would just do one!  It has a steampunk theme since I had a lot of things I could use in my stash and I really love steampunk.  LOL

I had some canvases that sat sadly alone by my desk waiting for me to use them so I used one for my project.  I was happy with it as it had depth (its canvas stretched on a wood frame) but wasn’t as heavy as a piece of wood would be.  Its 9.5 inches by 10 inches so not so big that I might not finish it but still enough to put lots of things on it.

My next task was to find things to put on it.  I searched every drawer that might have screws, bolts, etc.  I also checked my jewelry pieces drawer.  And the thing I really wanted to see if I could incorporate was Free Standing Lace (FSL).  I have quite a few pieces – you can use any leftovers, even pieces that might not be *perfect*. The FSL can add a lot of texture to your project.

I hope you will have fun following along and creating your own one of a kind masterpiece!


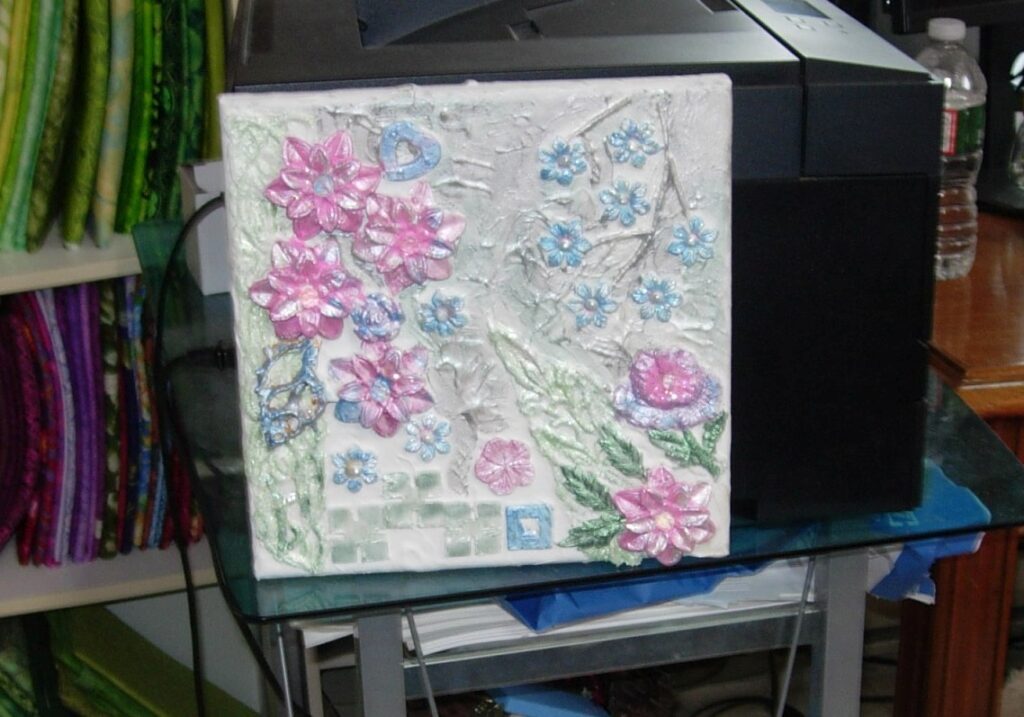
I have since done a more *flowery* mixed media. .  It made of a canvas board as my first project, Lace, beads of various kinds – the flowers are acrylic beads, mother of pearl – charms and beads, acrylic leaves, Czech crystals for flower centers.  I painted everything when done with a clear acrylic paint, with fine iridescent glitter.

Tutorial – Fairy Wildlife Quilt – Part 1

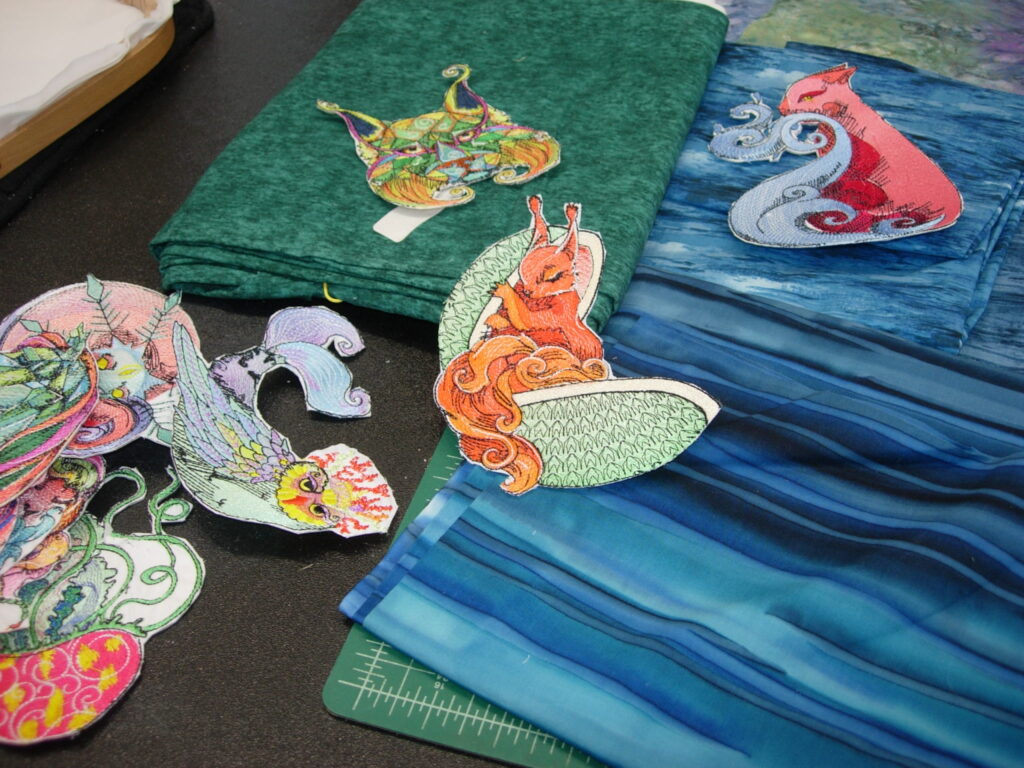
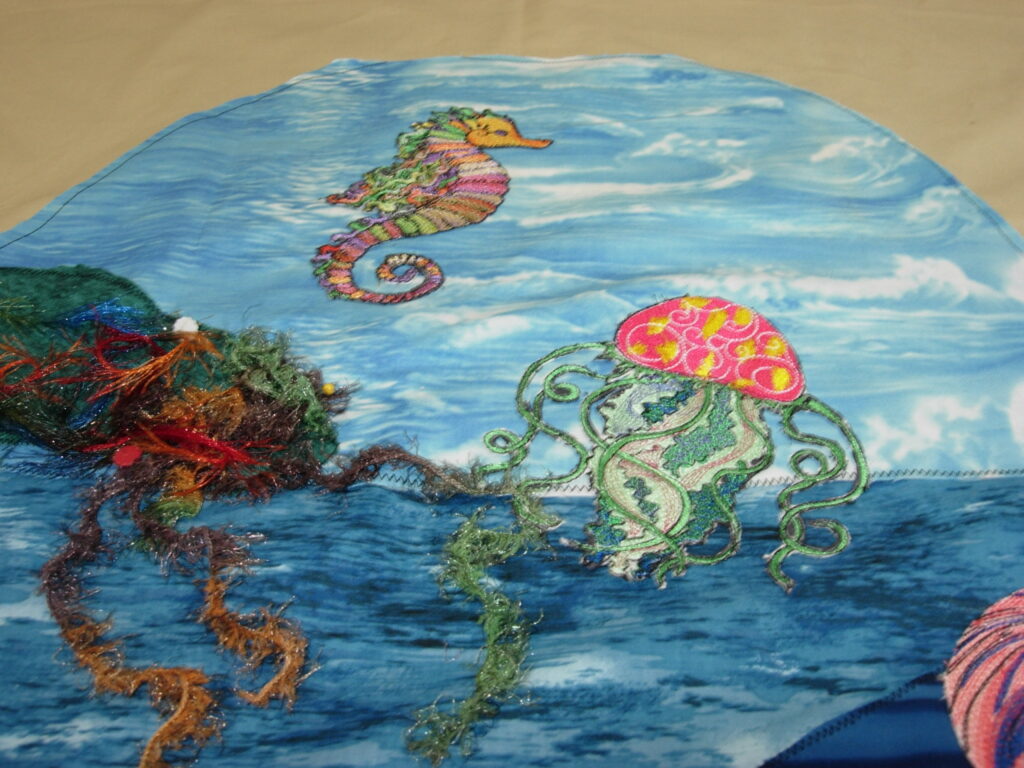
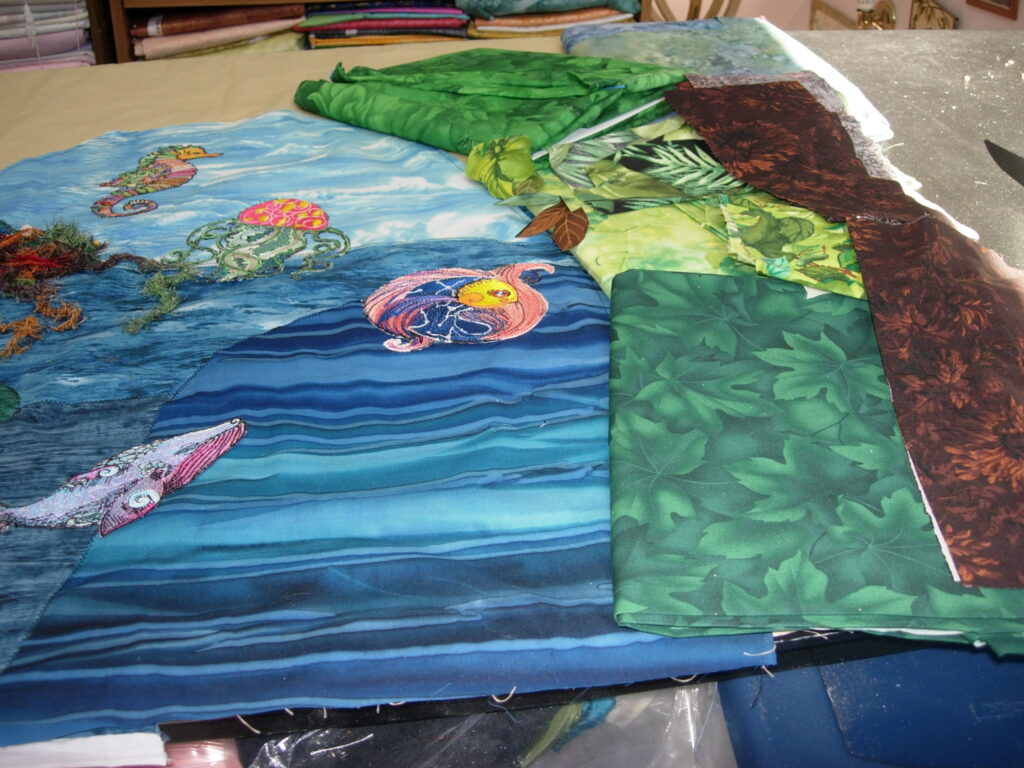
This quilt uses the three Design Sets of the Fairy Wildlife Series.  I am making a lap size quilt, but you can easily adjust the sizes.  My main purpose in this Tutorial is to show you an easy way to create a unique and fun design.  This first part does what I call the Ocean slice.

DOWNLOAD TUTORIAL PART 1     Tutorial- Fairy Wildlife Quilt Part 1

Here are some images from this Tutorial: