A change of pace….

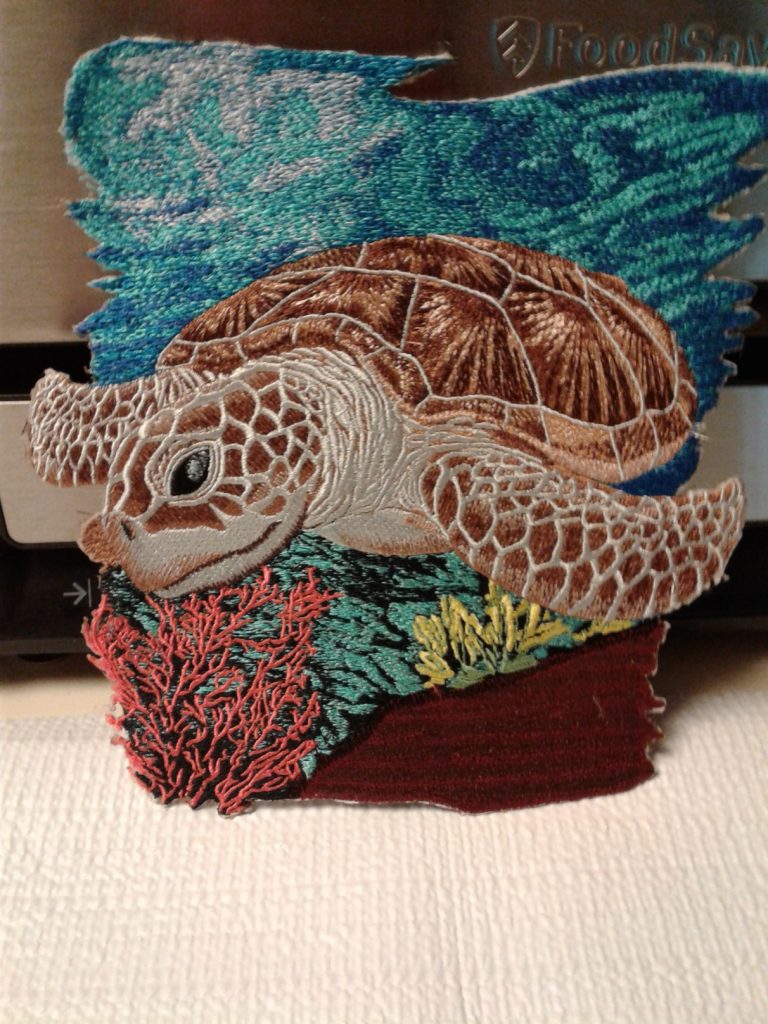
Hello everyone – I  know most of you are as busy as I am and always trying to figure out how to accomplish all that life brings PLUS all our crafts.  Since I’ve had this business, I’ve dropped my other crafts one by one as they just seemed too much work to do.  So I’ve been looking around for a craft that is different from embroidery (to give me a break) but that is easy to work on.  I think I’ve found the perfect craft!  Polymer Clay.  It doesn’t need any special containers – in fact it can be left out in the air just about indefinitely.  You can work on it a little and just sit it on the shelf.  It’s very easy to clean up after and really a lot of fun.  I set out to make something – I really didn’t care how it came out.  I just wanted something that I could pick up for 15 minutes or a half hour to refresh my mind for embroidery.  I’ve finished my first piece.  In addition to the clay, I used shells, beads, even Angelina fibers!  I looked on the net to see if anyone had used polymer clay and Angelina and couldn’t find any so I experimented.  This little project has made me wonder if small FSL embroideries could be incorporated.  Has anyone tried this?  So here is my Under the Sea jewelry box.  It’s certainly not a piece of art but it was so much fun!!!  It now sits on a table under my Under the Sea Fantasy in my Bathroom.

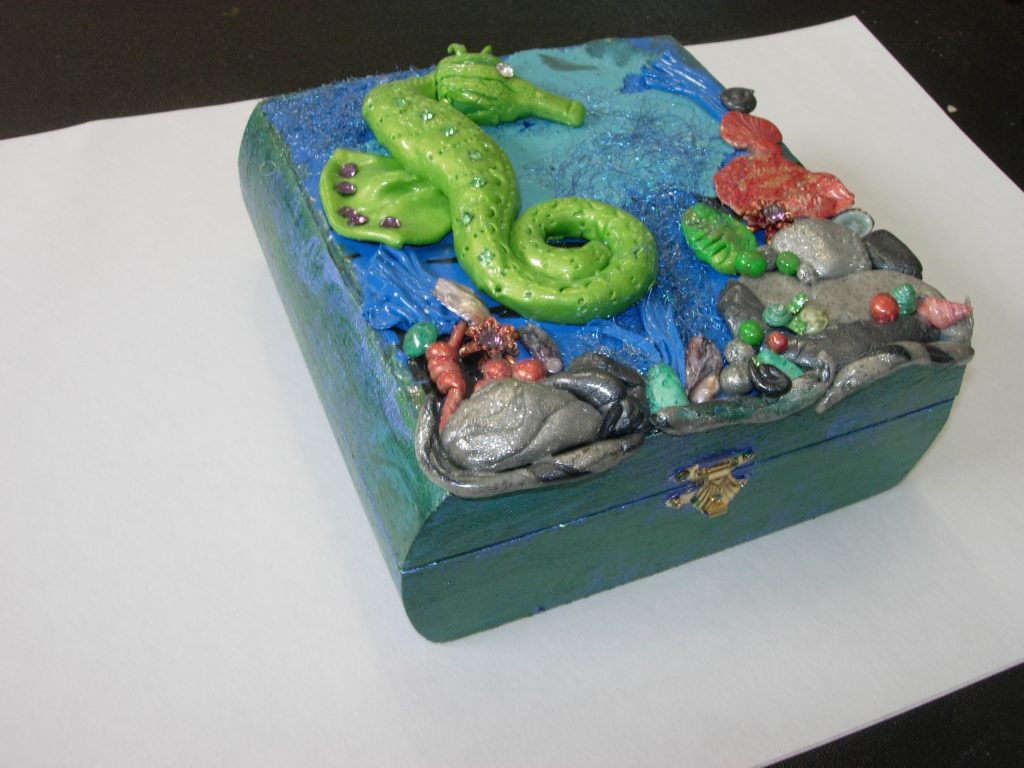
I just put clay on the cover of the box – I started with a thin layer.

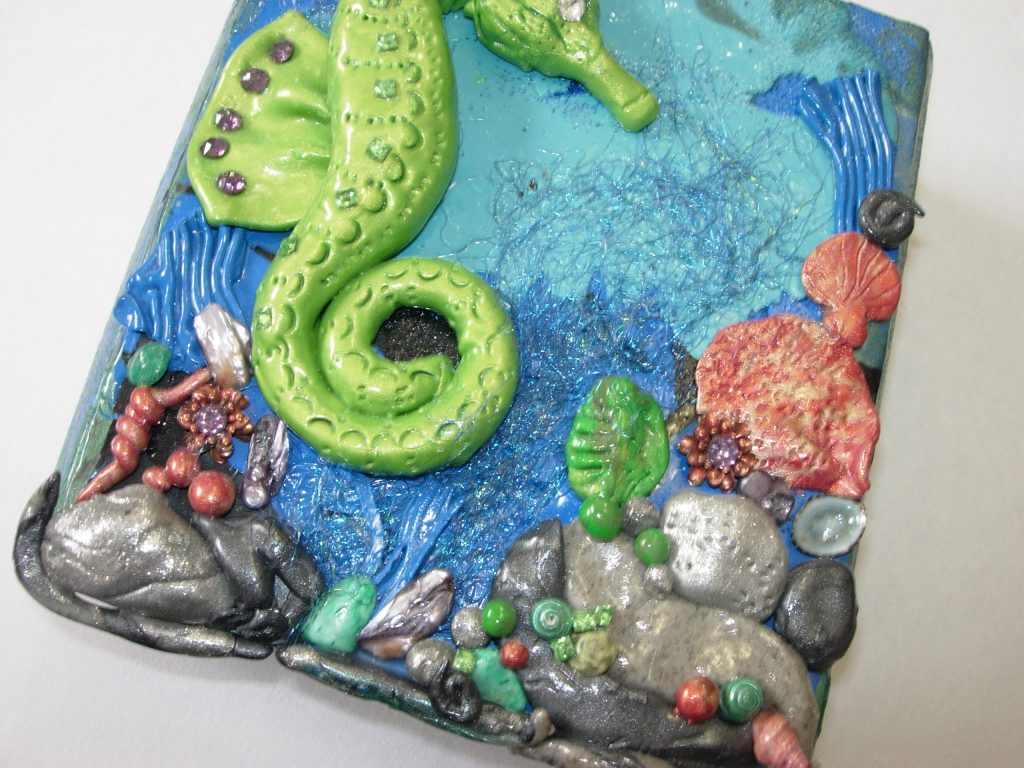
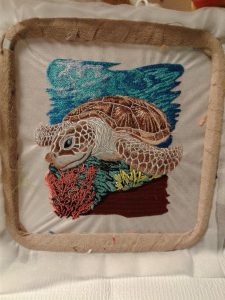
Photo isn’t that clear, but you see a couple of shells.  The *beads* are just small balls of clay.

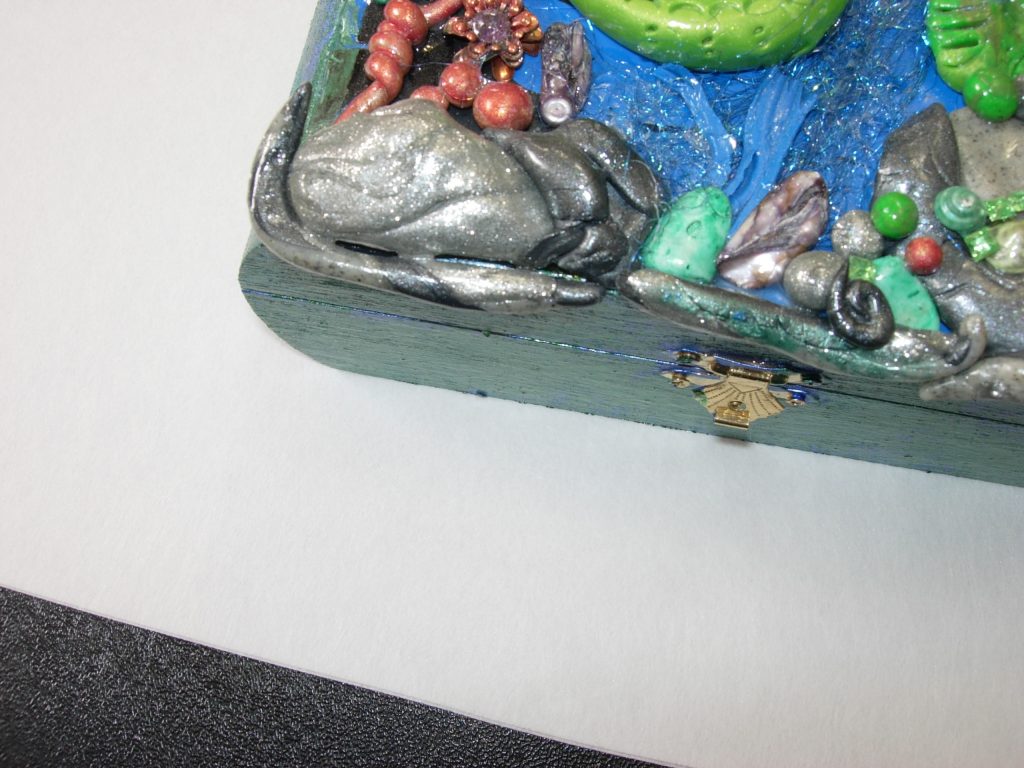
More shells and some Mother of Pearl Buttons.  I painted the sides of the box and covered the top with a couple of coats of glaze.  You can see the Angelina Fibers on the dark blue water.  I first pressed them into the clay – many times (LOL)  They still were mostly just sitting ont he surface, but I was determined to get them onto the project.  I just put some thick costs of glaze on top of the fibers.  They look great in person!  They have the shimmer and shine of Angelina, but also add a great texture to the surface.  My final touch was adding crystals  – his eye, on his fin, and among the bottom shells, rocks and beads.

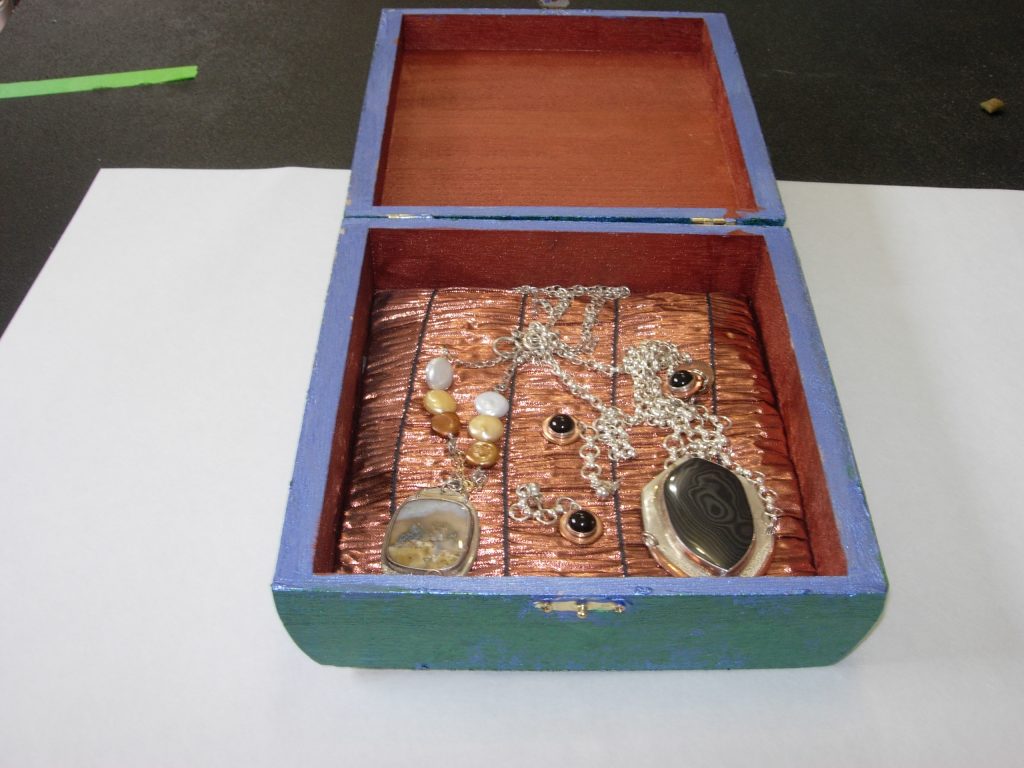
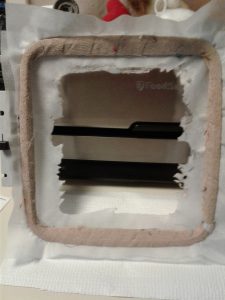
I painted the inside with a copper colored paint.  I cut a piece of cardboard the size of the bottom of the box and added a layer of batting.  I then covered it with a metallic fabric.

How best to dry Free Standing Lace

“Hi Suz,

Attached is a pic of how I do flat FSL.  This is the plastic that we use for needlepoint. I cut it to the size that I may need, put the embroidery in it and clip it down.  I can rinse and hang it to dry without ever touching the lace till it is dry.  Find out that nothing ever stretches this way.

Thought you might be interested.

Marge ”

Cat Tent

I’m sorry I didn’t take any photos as I was making this, but I will try to explain best I can. I took a piece of fleece and cut out the base. I had a small memory foam bathmat and I used this as a pattern so I could put it inside when the tent was done. I cut two pieces of the fleece. I took some high loft poly fill and laid this in the center of one of the base pieces. I stitched all around the base about a half inch in from the edge.

I thhen measured around my base for the length of the next piece of fleece I would cut. I hung my tent from a hook in the wall in the arch over the alcove. It will also hang and work fine from a hook on a flat wall ( I had tried that just to move it around). I used one of those no mark hooks and so far it hasn’t budged! I decided how high I wanted the sides of the tent and used this for the other measurement on my piece of fleece. So I cut one piece:
length around the base by the desired height.

I stitched this piece around the base I had made. I placed the wrong side of the base along the edge of the side piece and stitched. The seam was inside the tent and doesn’t show. And by using fleece, there was no reveling. I started and stopped the stitch at the center of the base as this would be their flap.
I folded over the flap and pinned it. I then took some big pleats along the top edge to make it small enough to add a hanger. I stitched these pleats from the inside and trimmed the seam allowance.
I then folded the tent together and stitched across the top. This could be done from the inside so the seam won’t show. I stitched a heavy ribbon to make a loop to hand from my hook.

After sprinkling a little bit of catnip in the center of the tent it was ready for its occupants. They spent a LOT of time in this during the winter! I’d often see two little faces at the doorway.

You can of course add some cute cat designs to really make this a custom tent!

Please feel free to ask any questions as I know it’s hard without picture as I went along!

Suz


Sheer Tulip

“I was hoping this would work as an applique using glitter.  It was very hard to trim away the excess glitter.  For me it works fine and I will have to clip several of the friskies showing in the photo.  Can hardly see them in person.

What I did was fuse fabric to the back of the glitter then went on as usual.  I assume if I had used the design on something, trimming would be easier.In person, it really is a lovely design and glad I tried it as an applique.

Joan”


BFC1651 Sheer Tulips

Large Embroidered Tote

From jc:

“I made this 24″ x 36″ 4 compartment tote to transport my wall hangings.

The handles are over 5 feet long and have a continuous embroidery design on them — Both the top and bobbin threads are continuous; no cuts or pieces.”

I LOVE Tote bags and use them for many things.  (that will be a tutorial later on) but I hadn’t thought of making one large enough for wall hangings.  I think this would be a great way to store our embroidered pictures when they aren’t gracing the walls.  You could hang them on hooks int he back of a closet or a similar space.  It would keep them clean and neat.  You could even make totes for different types!  I might add a zipper if I was going to use them for storage to make sure the embroideries didn’t get dusty.

This would be a great way to practice doing large designs too!  If there is a little *boo-boo* somewhere it wouldn’t matter and you would have very interesting Embroidery Tote bags!

Great Project jc!!!!

A wonderful Sewing Worktable

SueP of my Yahoo group told us about her new table!  It sounds and looks wonderful.

SueP: “My new sewing room is now done. Hubby finished his part of the cutting table tonight.  I still have some touch-up painting to do on it then I can start to unpack and sort all the supplies into the 35 new drawers. It is 93″ long and 42″ wide. I can’t wait to work on it”

Sandy: “What type of wood did your husband use to make the table? I had thought of getting some type of pressed board to make a large sewing table. I’m not sure of what it is called, but it is the size of plywood (4’ x 8’), but denser and heavier. I didn’t know if it would sag in the middle due to its length.”

SueP: “Thank you. Yes, you are describing the material he used. He built a frame under both top and bottom with 2×2 & 2x 3 lumber. Like you would build a wall. The legs are not adjustable; but we measured the height that I wanted to work at. It is slightly higher than a standard counter. He then laminated it with a smooth product used for making kitchen counters. I bought the drawers at WalMart.”

Pre-Shrinking Stabilizer

Yesterday someone asked my Yahoo group about whether stablizer can shrink and if so, how to prevent that?  We’re getting some great answers:

ROBERTA:

I really would like to get some feedback on a particular issue: SHRINKAGEI recently read somewhere that some people both prewash their fabric AND stabilizer to prevent shrinking after a newly embroidered garment is washed. I would like to get some feedback about this. I have been using Sulky stabilizer (nylon mesh) for tee shirts. After continuing to get the same results, i.e. puckering after washing an embroidered tee shirt, it finally occurred to me that the stabilizer was shrinking.

Are there any brands out there that don’t shrink? Does anyone on this list prewash their stabilizer? Any help I can get with this issue will be appreciated.

SUZ:

I’m not aware of any stabilizer that doesn’t shrink at least a little.  I don’t prewash, but I use my steam iron and just shoot hot steam on the stabilizer – it’s quick and easy.  Be sure to let it dry before using it or it will stretch in the hoop.  That seems to do the trick with all the kinds I’ve used.

LINDA:

I just steam mine before using   Seems to eliminate any shrinkage.  I think they all shrink some, even the non-fabric based ones.  Don’t touch the iron to the stabilizer, just hold it about ½ inch above.

DOREEN ABOUT FUSIBLE STABILIZER:

I run under a tap of warmer water and hang to dry. Steam by holding the iron above the stabilizer and then fuse

LINDA:

I lay my fusible stabilizer with the fusible up when steaming.  Then I turn it over to fuse it to my fabric.

In response to my question about what brand of stabilizer, Marge replied:  I use Floriani’s nylon mesh, like his best.

Responding to a question about using this method for Jeans, Marge replied: I would use a product like Wonder Under, fuse the design to the jeans and then applique it by hand.  It  should stay on without a problem.


A Fantastic way to Embroider

Marge has been doing her embroidery this way for quite some time and she is sharing her method with all of us!

*Adding embroidery to any item makes it more beautiful.  But if you are like me how many times has the placement been wrong or a little off?  Embroidery is very hard to remove and even if you do on some fabrics it leaves unsightly holes.

I do ALL embroidery that goes on clothing on nylon mesh.  It doesn’t matter whether a small stitch count or very large. Any design under 60,000 stitches goes on ONE sheet of mesh, over that I use two.  I know what you are thinking, it used to be 1 sheet for every 10,000 stitches.  The turtle I am featuring here has 167,000 stitches, would you use 16 sheets of cutaway?  I did it on 2 sheets of nylon mesh.  After  the design finishes you just appliqué it where you want it.  It never is crooked or has any puckering.  As you can see the turtle does have some puckering, now this would not be very pretty on a shirt but after removing no puckering.

When doing tee shirts or baby onsies this is the way to go.  With the onsies or and kids chlothing I put a card in saying that when he/she doesn’t use it anymore the embroidery can be removed and put on something else.  I hoop one or 2 layers of mesh and proceed with the design right ON the mesh.  When it finishes stitching out I use a stencil burner or if you don’t have one you can cut is out with a sharp pair of scissors.   I leave the design in the hoop till I remove it, it is much easier to do it this way.

If you have any further question or comments please let me know.

Marge in Fl.*