it’s very successful!!!! Suz
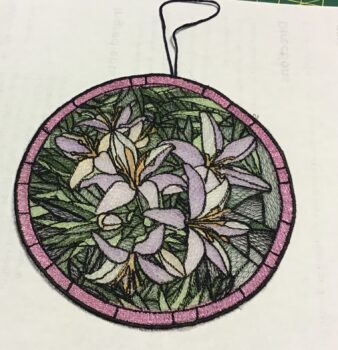
Gerda wrote and asked about making these circles freestanding. I suggested using organza and it came out great! It would be so pretty hanging in a window.
BFC Creations – Where Thread comes to life!
it’s very successful!!!! Suz
Gerda wrote and asked about making these circles freestanding. I suggested using organza and it came out great! It would be so pretty hanging in a window.
My first BFC creation
You did wonderful Ingrid – love the border fabric.
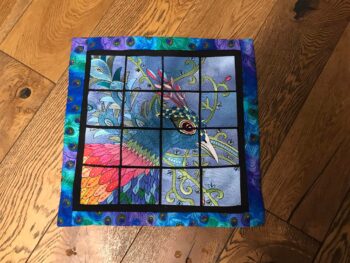
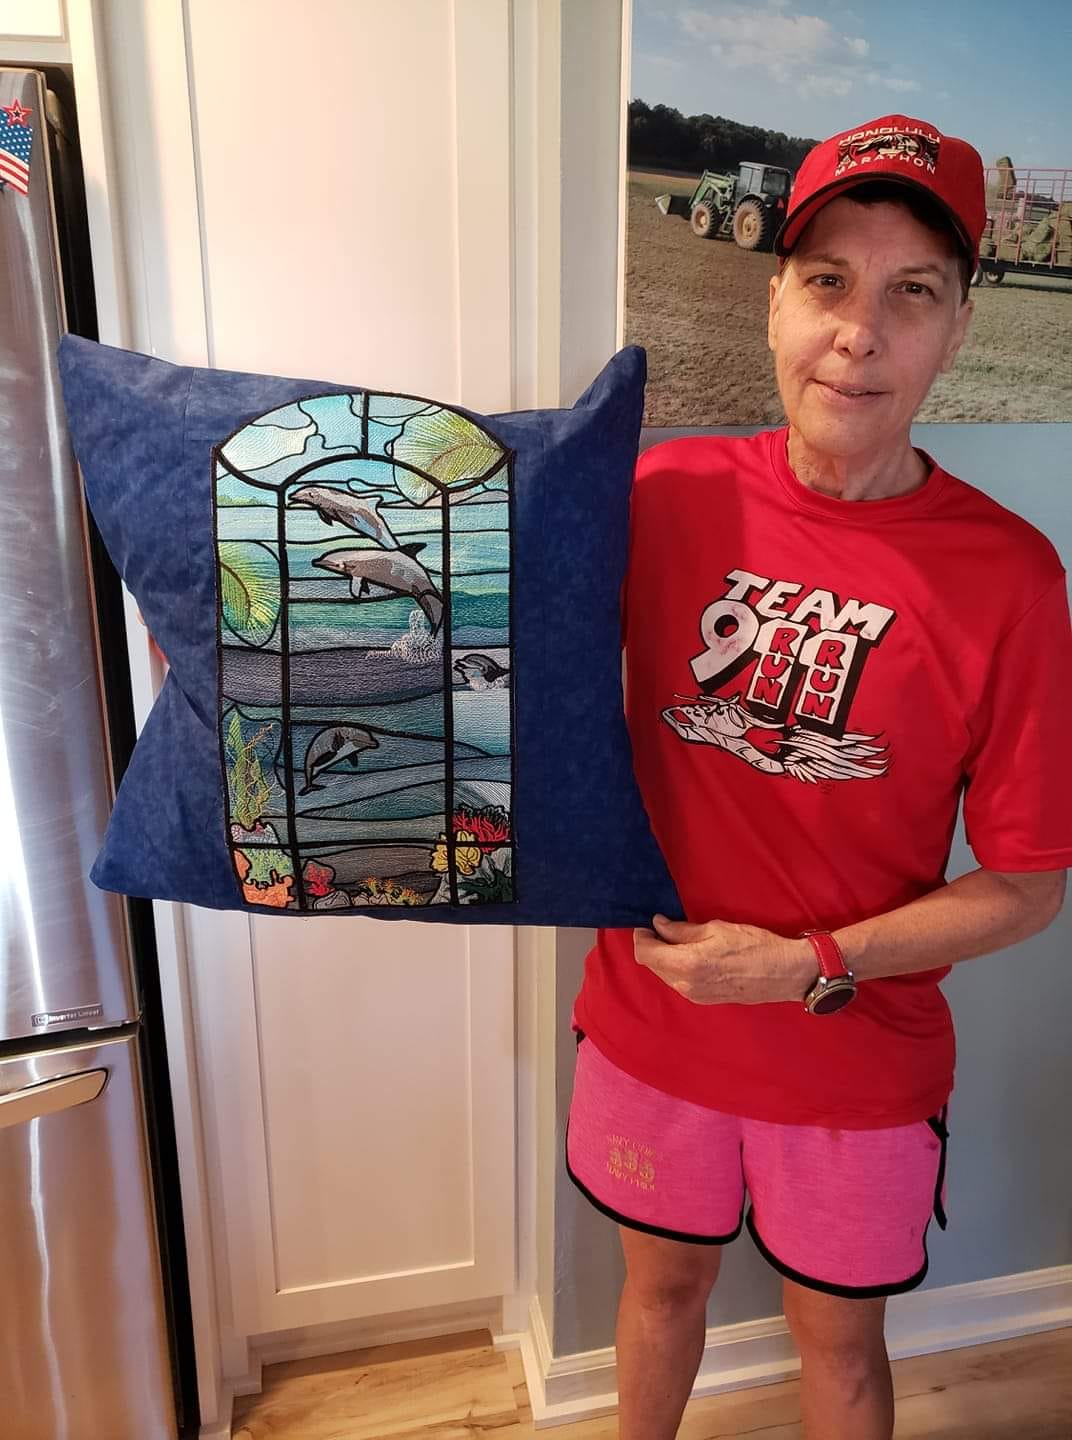
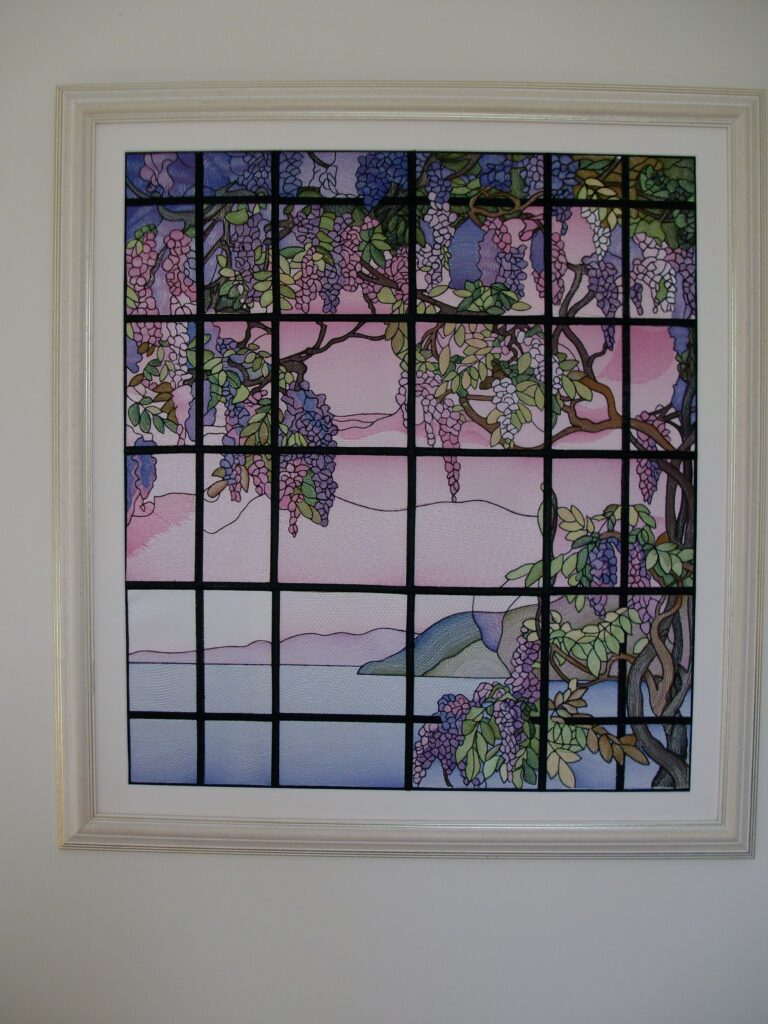
Under my embroidery needle–made this for hubby — “stained glass dolphins”. 12 panes embroidered and then sewn together to make the ‘window’. Then I sewed it into a pillow. Beautiful design Suz. Over 100,000 stitches. I.NEED.MORE.THREAD. ![]() Came out nice I think. Hope everyone has a great week.
Came out nice I think. Hope everyone has a great week.
I’m sure hubby loves it!!! Suz

Just finished the Dove of Peace. Seemed appropriate at this time.
Perfect Gerda!! It came out beautiful! Suz

Worked out so niche but a lot of work!
It was worth your work Jannie – you did a beautiful job- it’s put together beautifully!
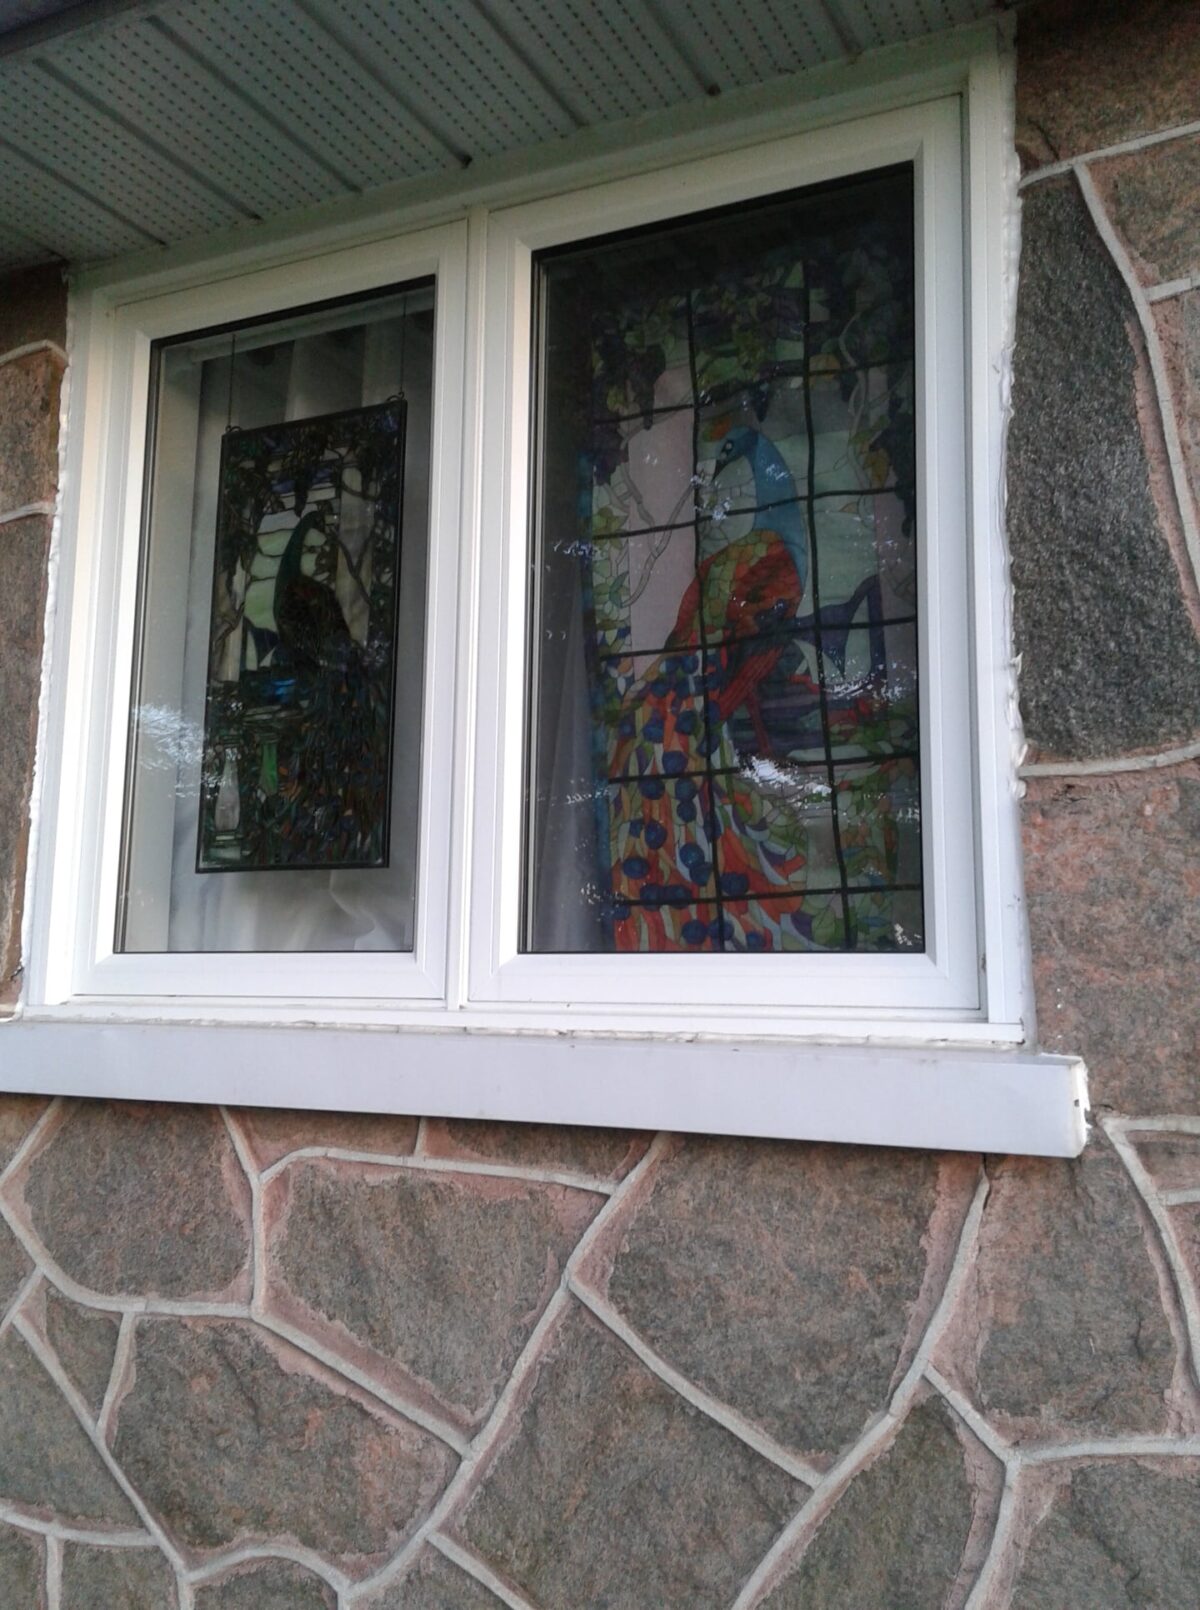
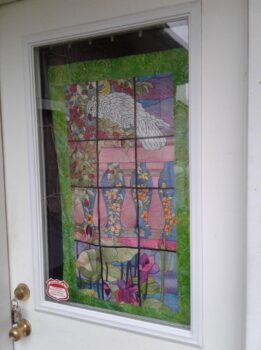
I love the way Kelly plans to have the Stained Glass designs in her windows and door. Looks great ! I believe other design is our peacock.

Hello, this is my work, thank you for your embroidery design, it’is very beautiful.
Un bonjour de France
Lucette
Very beautiful Lucette! Suz
Howdy! Happy Spring-ish. It’s 60 plus degrees in Indiana today, and supposed to snow next week. I always feel really sad for all the early blooming flowers this time of year, ’cause you never know if they will make it to real spring or freeze trying. With all that said, I want to show you a picture of Spring that we don’t ever have to worry about. Thank you for your beautiful IRIS FIELDS. The only liberty I took outside of your color list was to use a variegated green in place of the Light Lime. I really like how it turned out. It reminds me of fresh cut lawn grass. I hope you approve. Thanks again,
Had to share….
One layer stiff organza, two layers Vilene, rayon thread. Melted edges of organza. One window showed to much reflection but it is great! Making for the whole family to decorate for fall. LOVE your designs!
Thanks, Laura
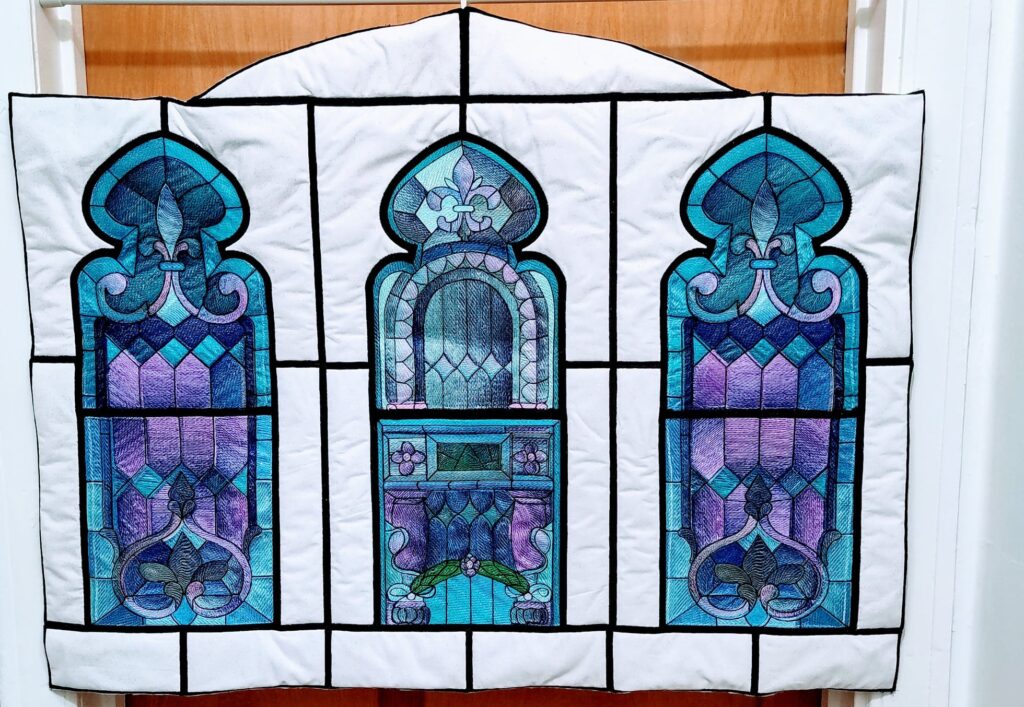
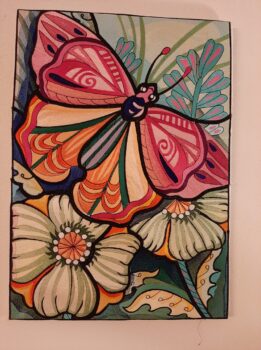
I’m happy to say Im finished and even with my boo boo’s I absolutely love it ! my learning curve has taught me several things for my next one . Oh and while Im no where near y’alls level 2 things that greatly helped me and I quickly figured out was 1 while sewing panels of all embroidery together was to use quilting gloves the grip you get is fantastic and it never hurts the embroidery at all making feeding it to your machine a breeze , # 2 while my feed dogs and foot worked together the grip of my foot seemed to ever so slightly misalign my pieces from bottom panel well a teflon foot ( I know supposed to be for leather lol ) stopped all the misalignment hope this helps someone ![]() . Here is my version of Kentucky Triptyc
. Here is my version of Kentucky Triptyc
Great suggestion Tzu! I’m trying this the next – I have a pair of gloves I never use. 🙂 Suz